MIDI Routing
For plugins that support MIDI routing, such as Chroma and Rezonator, this guide will demonstrate the steps necessary to do so in various DAWs.
Prerequisites
Before continuing, ensure that the plugin has MIDI input enabled. For plugin-specific instructions, visit the respective manuals.
FL Studio 12+
Ensure you have a Xynth Audio plugin open in the effects section of the mixer.
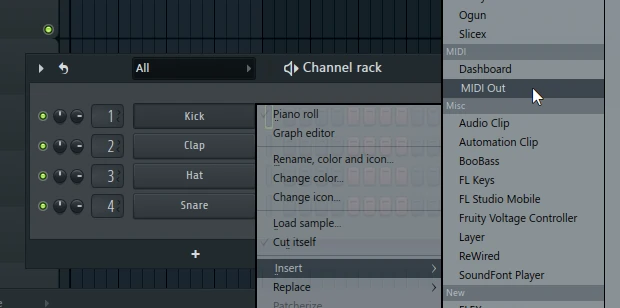
1. Add MIDI Out
Add an instance of the MIDI Out generator into the channel rack or playlist.
2. Choose a MIDI port
Using the Port parameter on the top-right, choose a unique port. The exact value does not matter, so long as it is not being used anywhere else in the project.
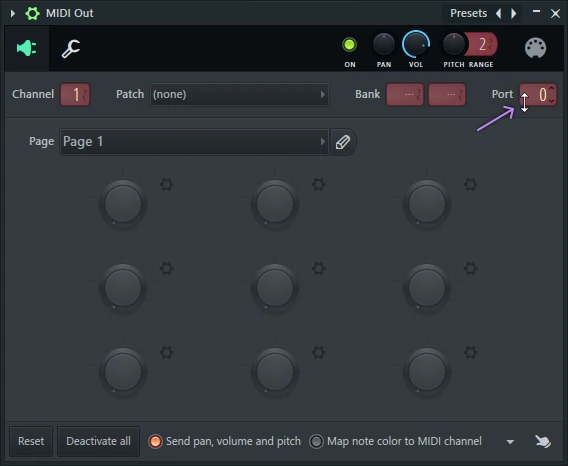
- For this example, we will be using port number 0.
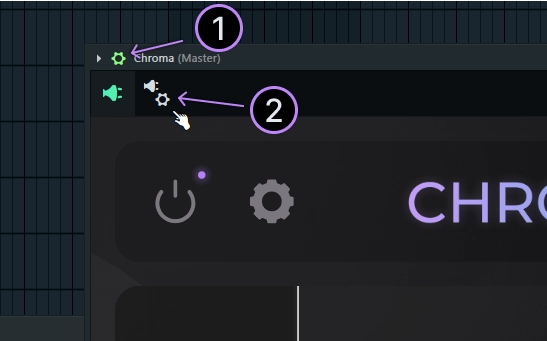
3. Open plugin wrapper settings
Open your Xynth Audio plugin of choice. On the top left of the window, use the settings buttons to open the plugin wrapper settings as shown in the image below.
4. Choose the MIDI input port
Using the Input port parameter, choose the same value as used in step 2.
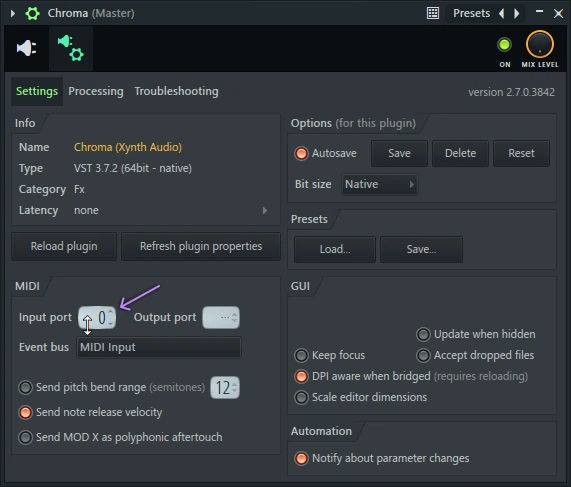
- Continuing the example, we will select port number 0.
5. Draw/play MIDI
Select the MIDI Out generator we instantiated earlier. Either draw notes into the piano-roll or play your MIDI device.
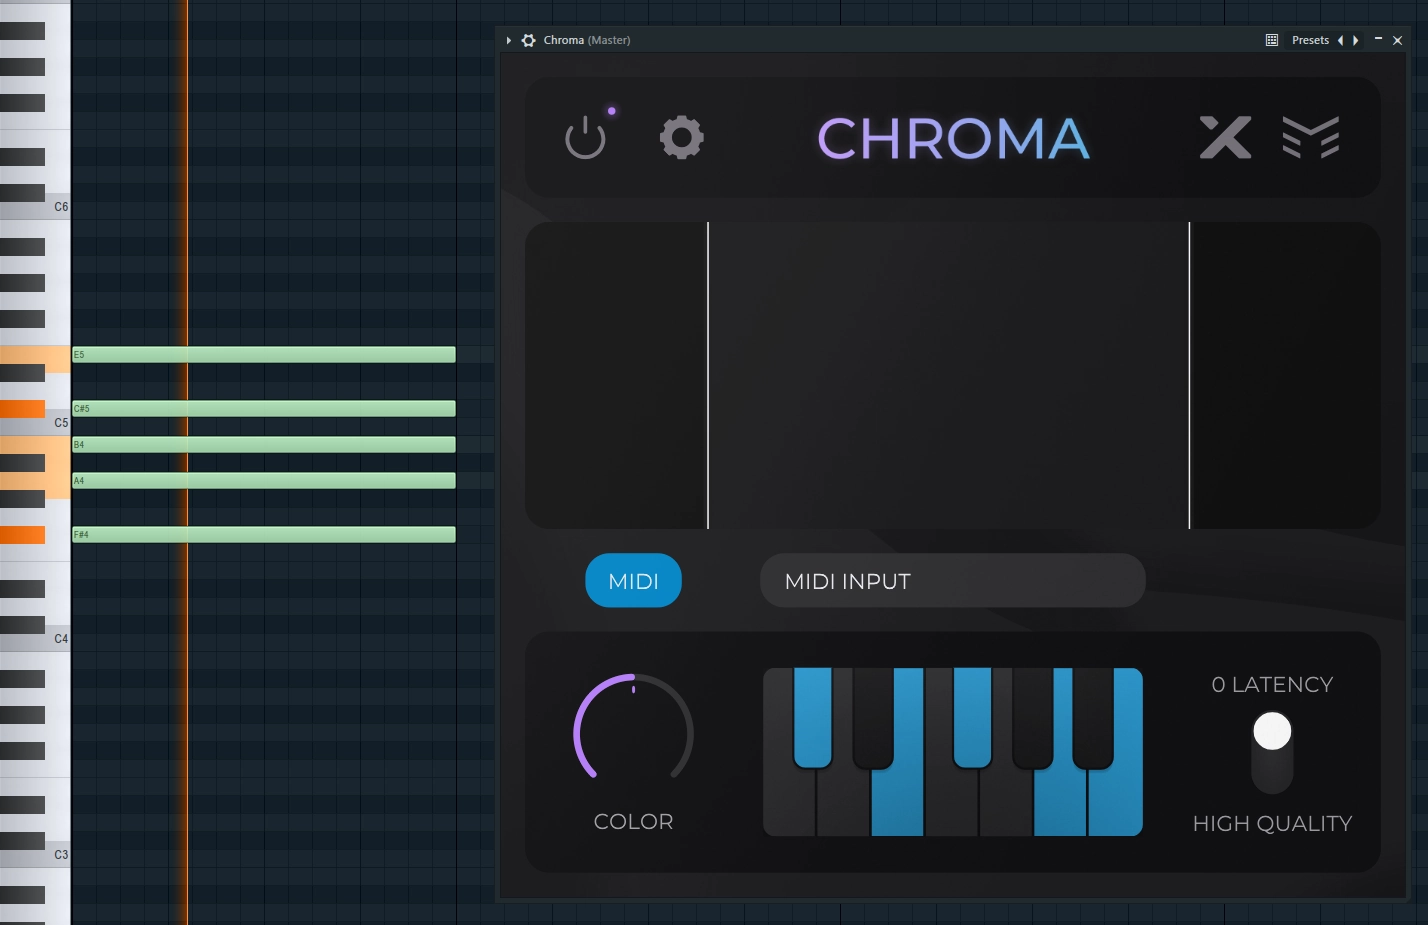
The Xynth Audio plugin interface should have the corresponding notes light up.
Enjoy!
Ableton Live 10+
Ensure you have a Xynth Audio plugin open as an effect.
We present two different methods of routing MIDI in Ableton Live:
- MIDI track routing. Easiest to setup.
- External Instrument routing. Requires more work but is more flexible.
When to use Method 2 over Method 1
To demonstrate the flexibility of the second method, imagine a scenario where a MIDI track already has an instrument, but you would still like to route its MIDI elsewhere.
- To achieve this, put the existing instrument in a group
(select the instrument, then press
CTRL + Gon Windows orCMD + Gon MacOS). - Create a new chain and insert the External Instrument device there.
- Follow the rest of the Method 2 steps.
Method 1
This method uses the MIDI track's built-in MIDI routing.
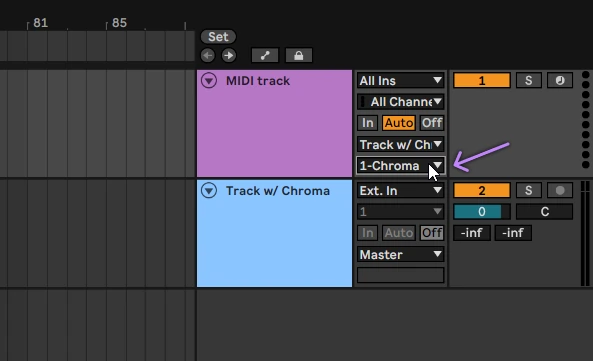
1. MIDI track routing
If you haven't already, create a new MIDI track.
On this MIDI track, use the Output Type dropdown menu to select the track with the Xynth Audio plugin.

If there are multiple plugins/devices that can receive MIDI, ensure to select the correct one using the second dropdown.
2. Draw/play MIDI
Using the MIDI track, draw notes into the piano-roll or play your MIDI device.
The Xynth Audio plugin interface should have the corresponding notes light up.
Enjoy!
Method 2
This method uses the External Instrument device to route MIDI.
- Using this method allows for the routing of MIDI even if the track already has an instrument.
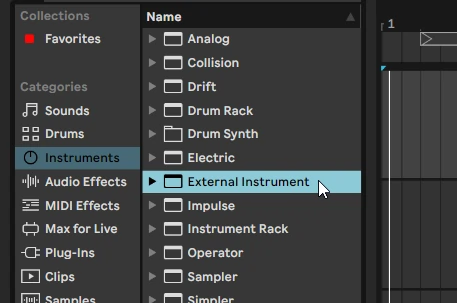
1. External Instrument
Add an instance of the External Instrument device onto a MIDI track.
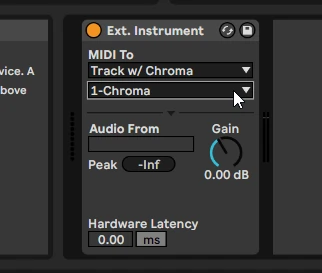
2. MIDI To
Using the MIDI To dropdown, select the track that contains the Xynth Audio plugin.
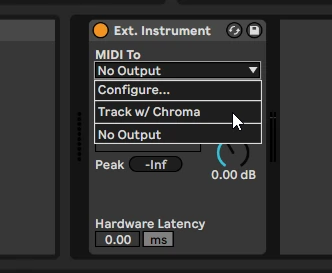
If there are multiple plugins/devices that can receive MIDI, ensure to select the correct one using the second dropdown.
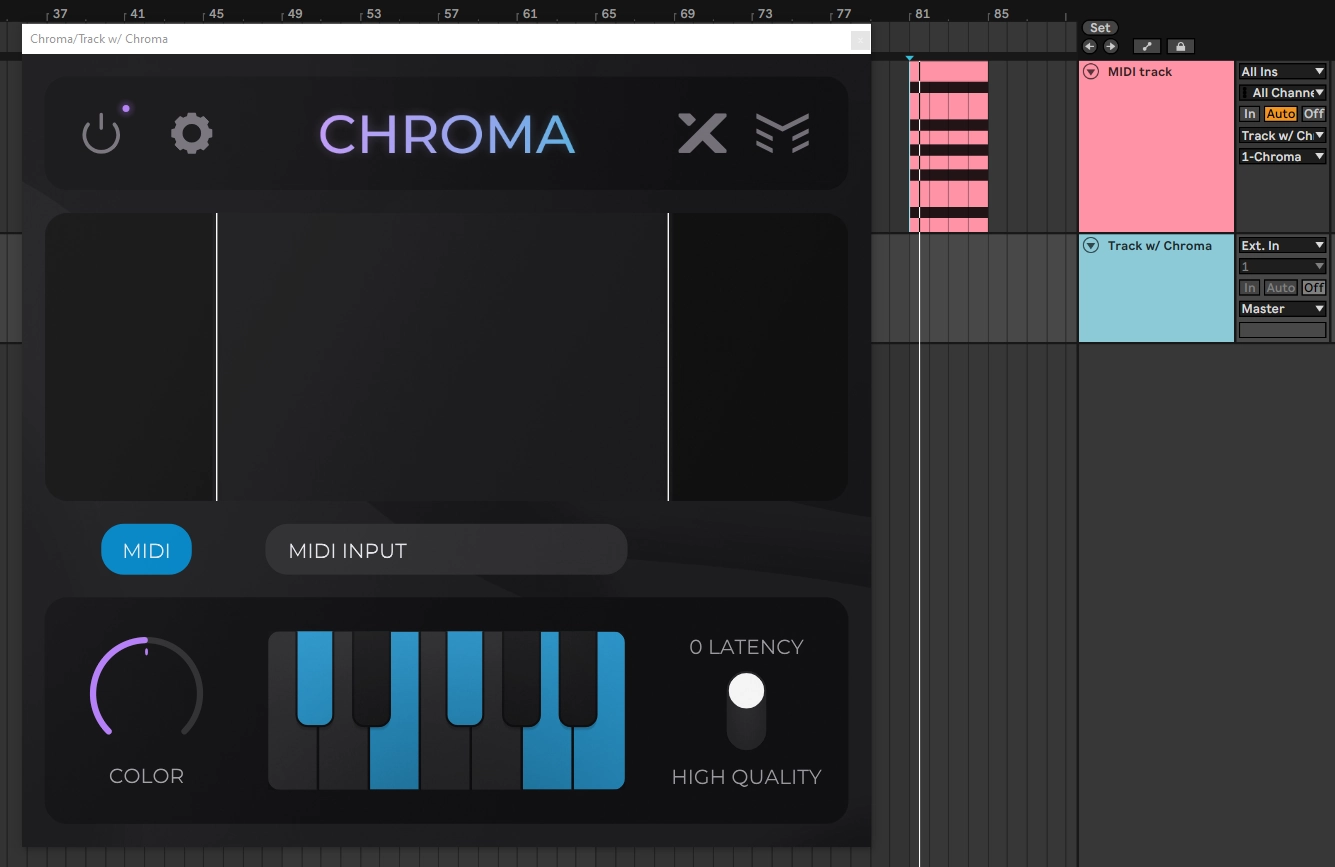
3. Draw/play MIDI
Using the track with the External Instrument device, draw notes into the piano-roll or play your MIDI device.
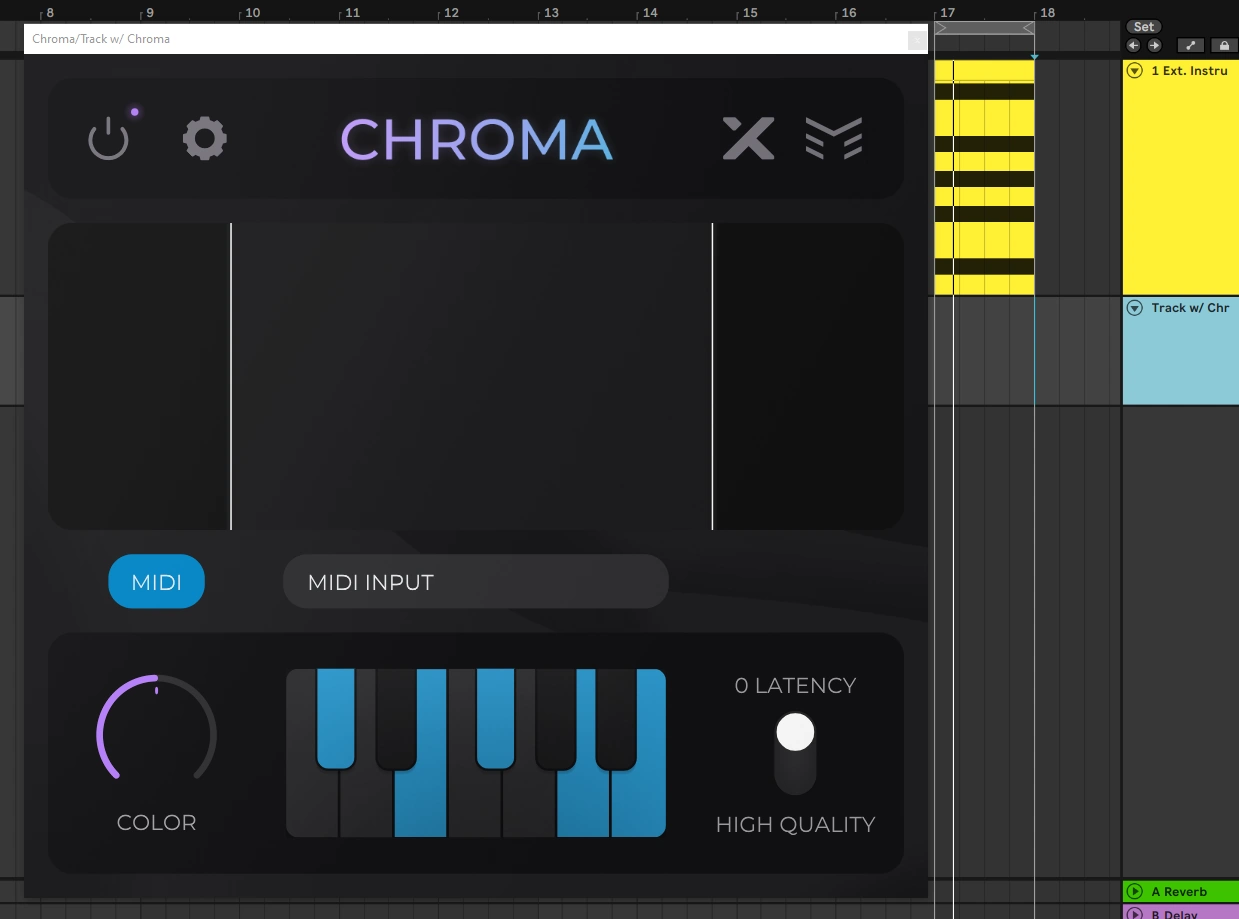
The Xynth Audio plugin interface should have the corresponding notes light up.
Enjoy!
Logic Pro X
MIDI routing has a unique workflow in Logic; MIDI-controlled effects are treated as instruments which can process the audio of other tracks.
1. AU MIDI-Controlled Effect
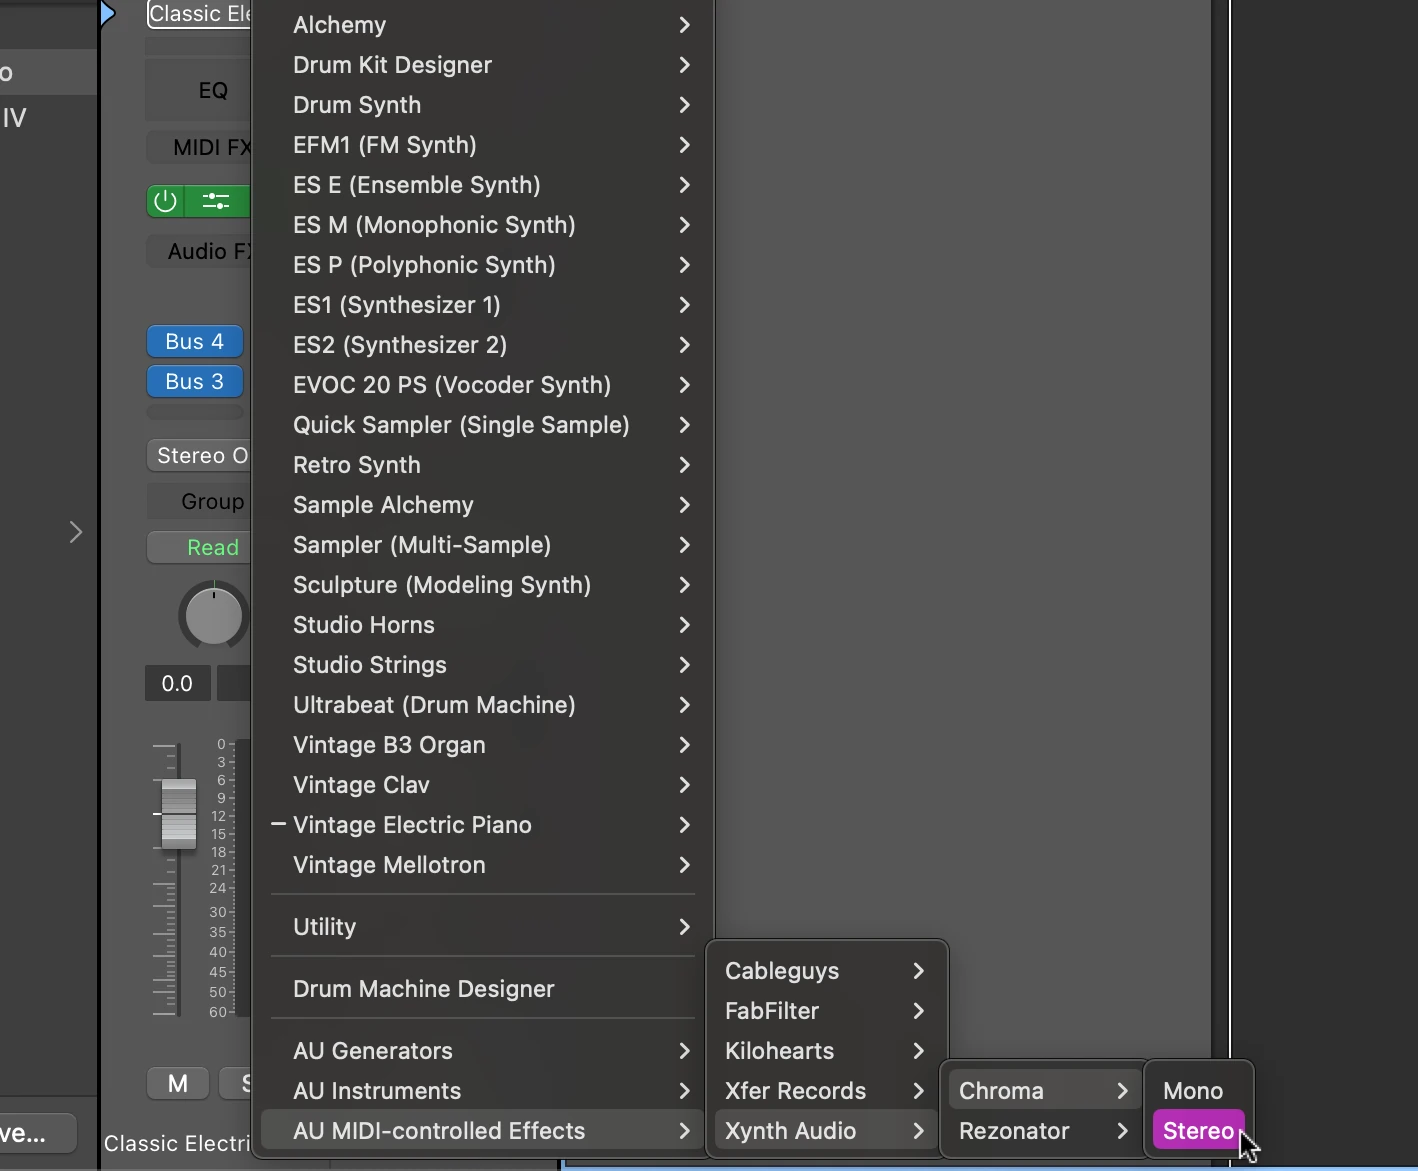
Add a new MIDI track and use the dropdown to choose a different instrument.

At the very bottom of the instrument list, there is an AU MIDI-Controlled Effects section.
Within this section, select your Xynth Audio plugin of choice.
2. Side Chain Input
At the top-right of the plugin interface there is a Side Chain input dropdown.
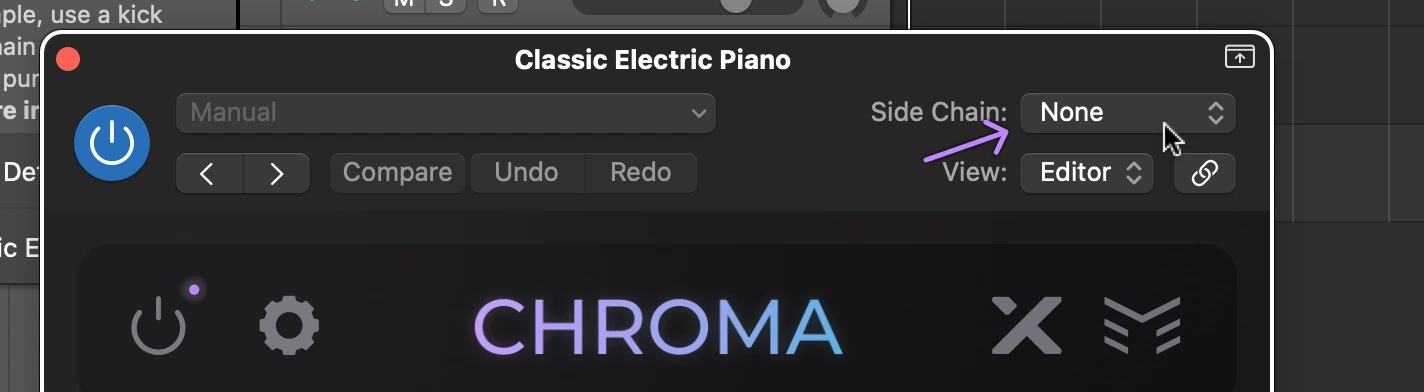
Use this dropdown to select which existing track you would like process with the Xynth Audio plugin.
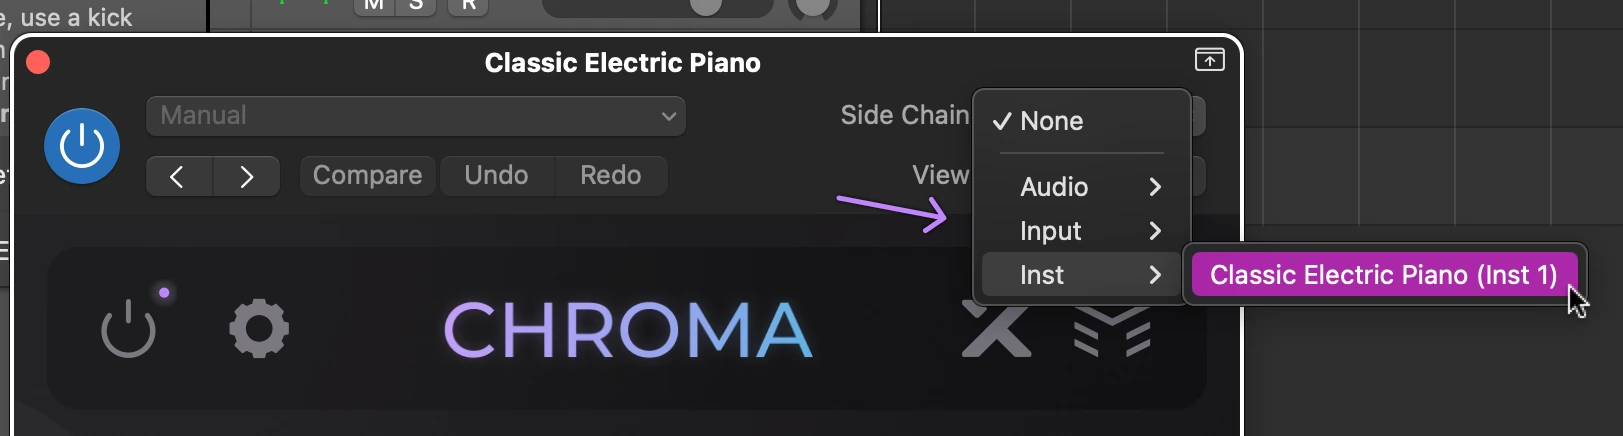
Be sure to mute the track that is being processed.
3. Draw/play MIDI
Using this newly-created MIDI track, draw notes into the piano-roll or play your MIDI device.
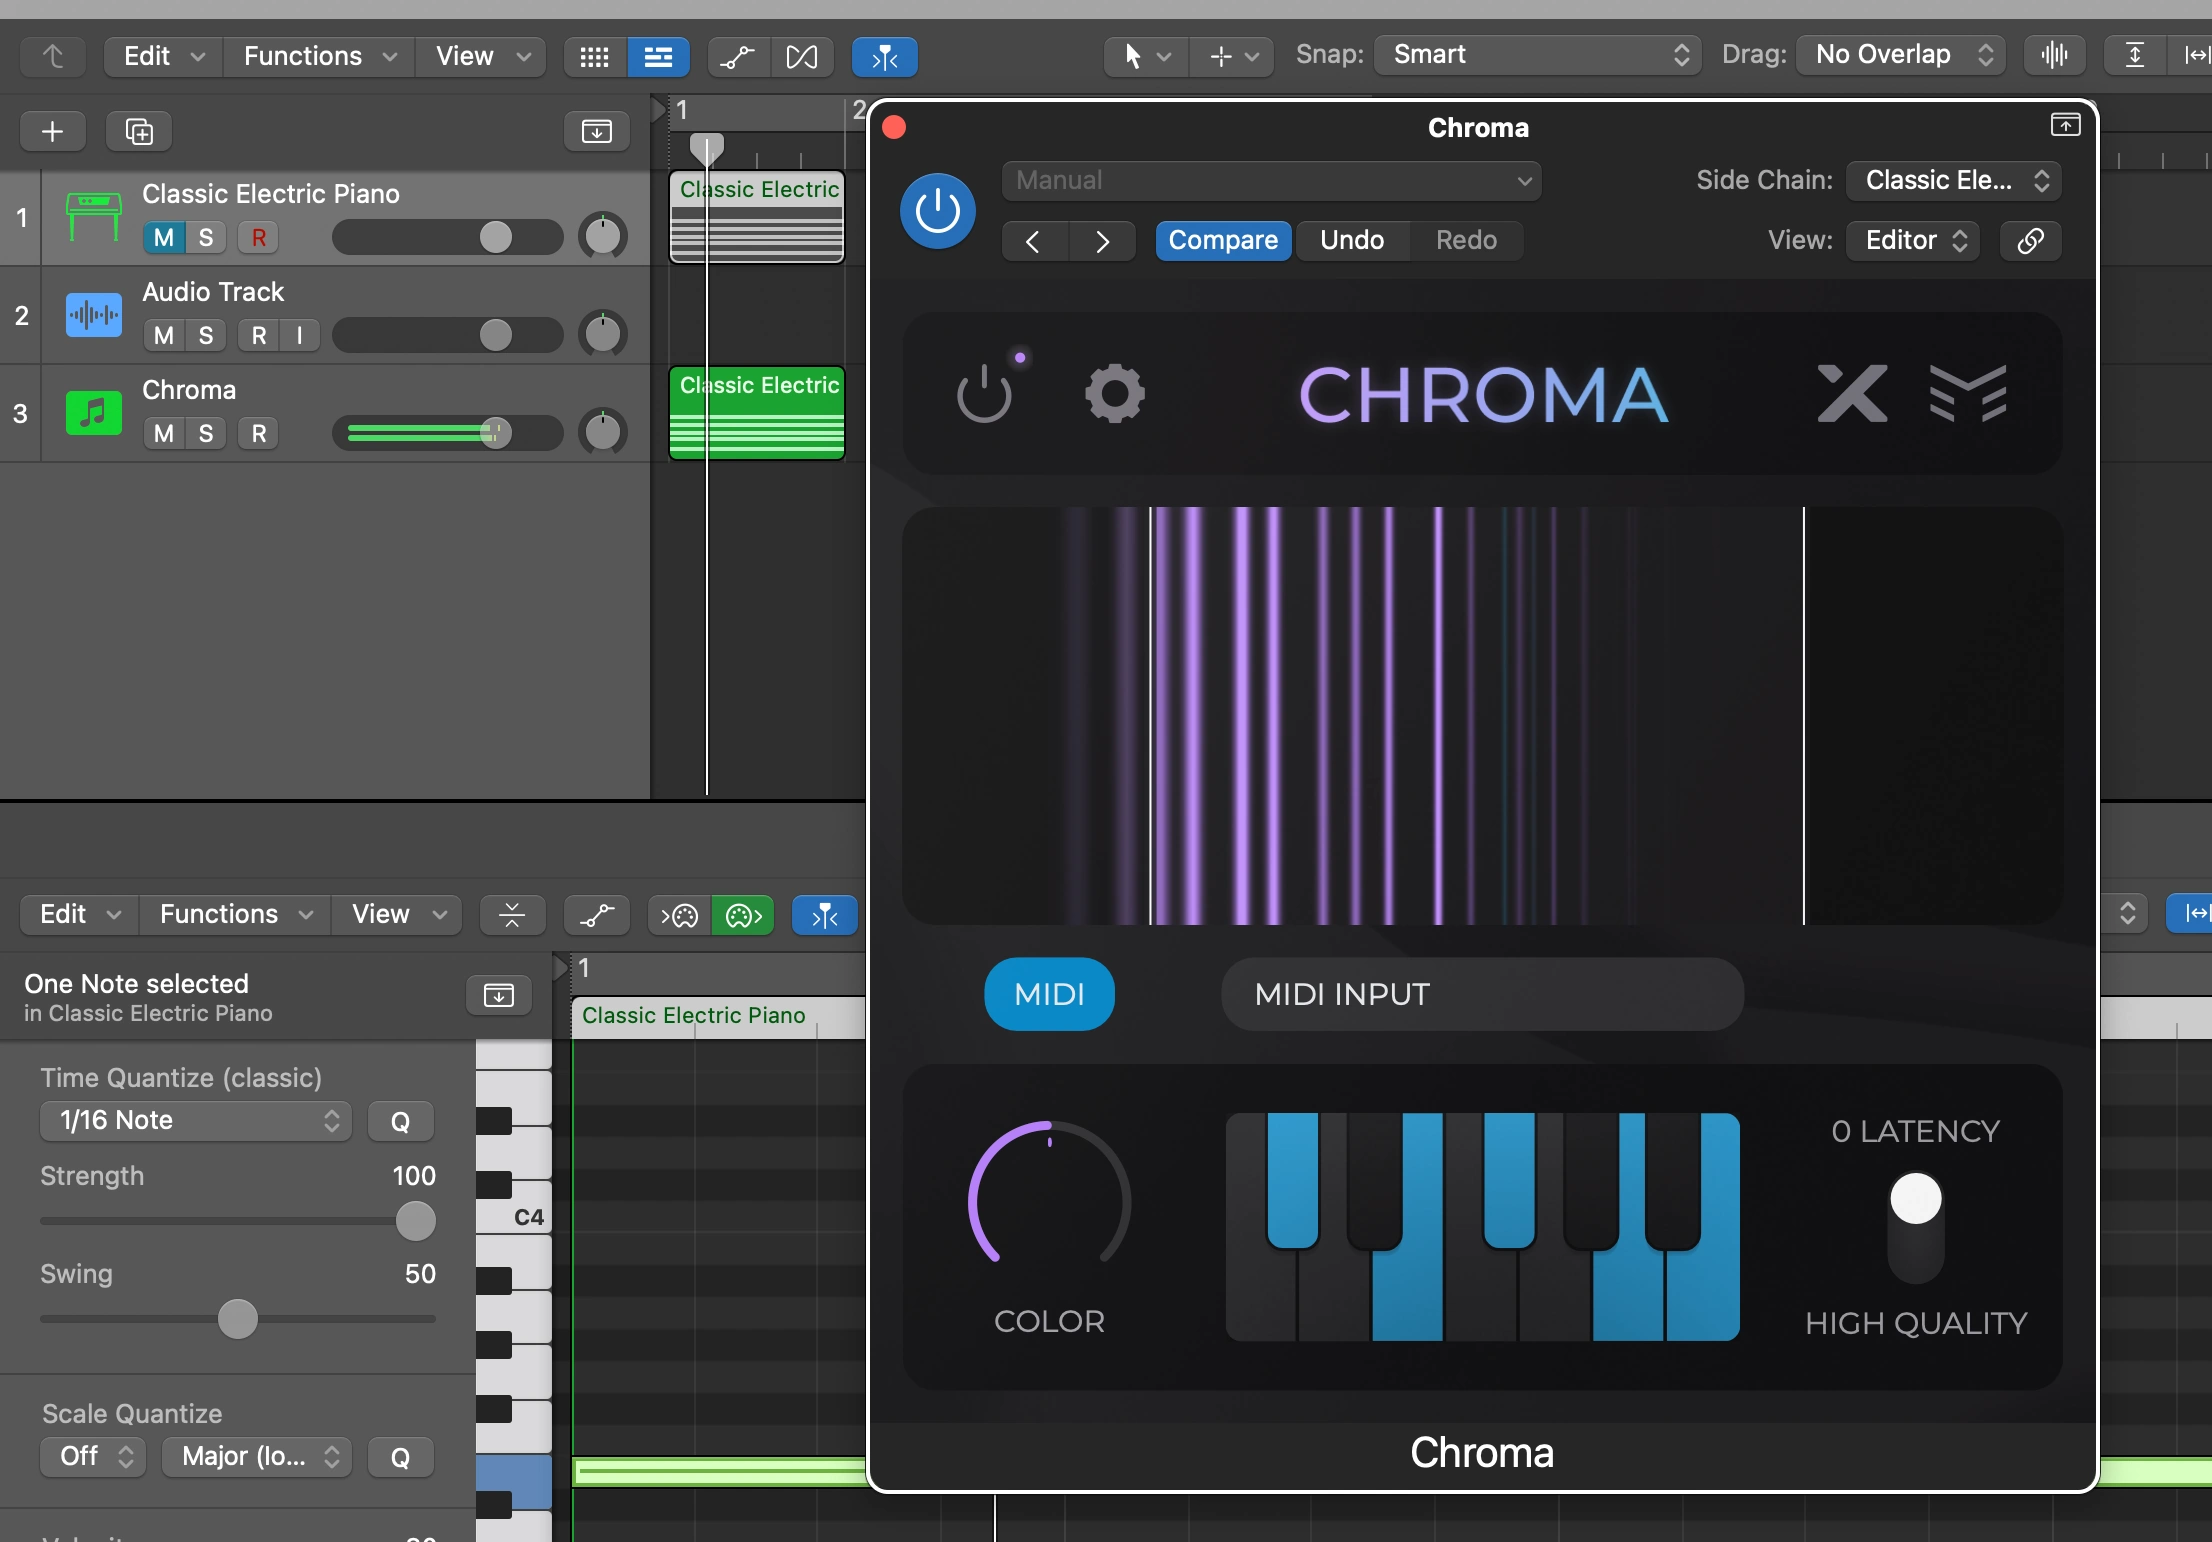
The Xynth Audio plugin interface should have the corresponding notes light up.
Enjoy!
Additional DAWs
Does your DAW of choice not have a MIDI routing guide?
- Feel free to email us to let us know which DAW you would like to see added.
- Join our discord and ask our community!