Chroma
Chroma: Harmonically sweeten your sound. Collaboration between Xynth Audio and Nasko.
Overview
For a general overview of Chroma, visit the product page.
- To reset any control, double-click it or right-click it and choose RESET.
- To check for updates or view the about screen, click the Xynth Audio logo on the top-right.
Basic Controls
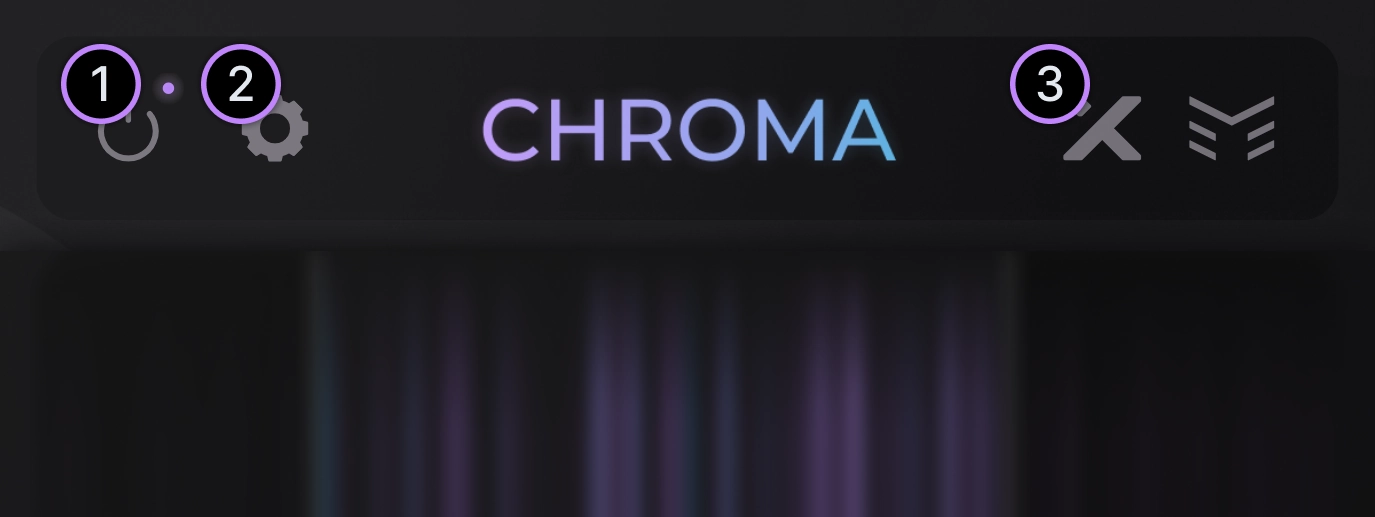
- Bypass plugin.
- Open/close settings menu.
- View about or check for updates.
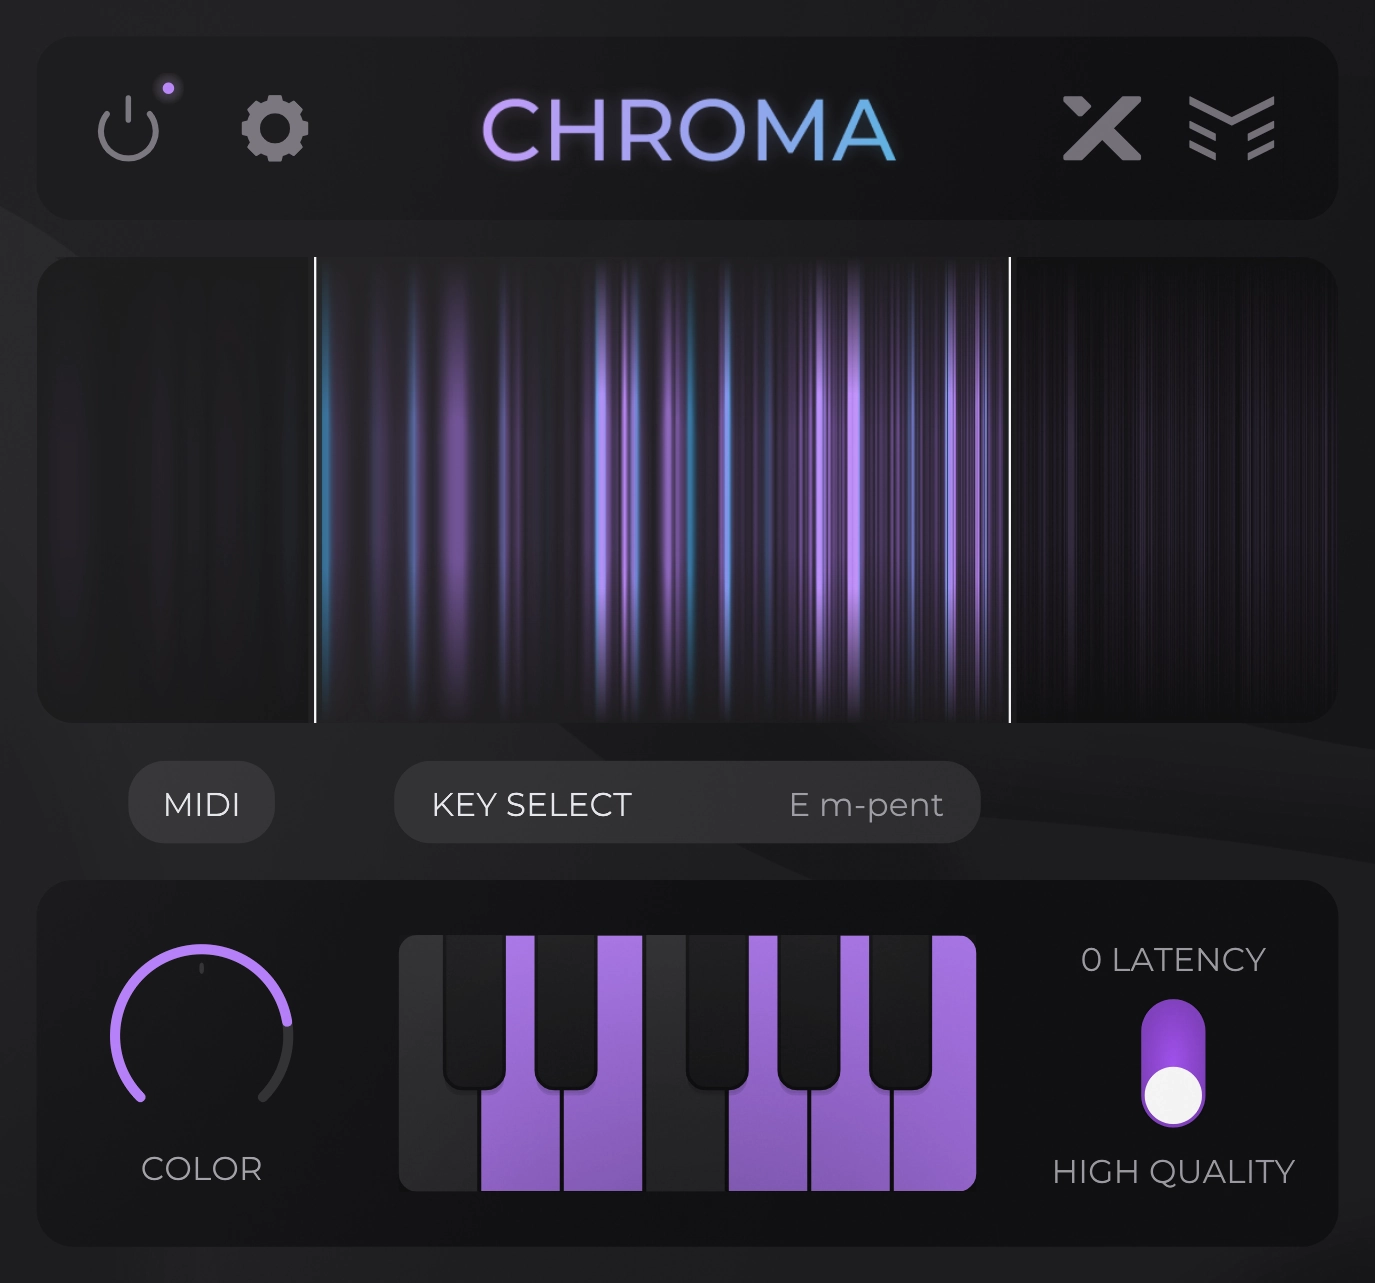
Visualizer
Controls
Hovering the cursor over the visualizer area will reveal additional controls.
- Mute side-bands.
- Adjust affected frequencies.
- Toggle expanded frequency range.
Visuals
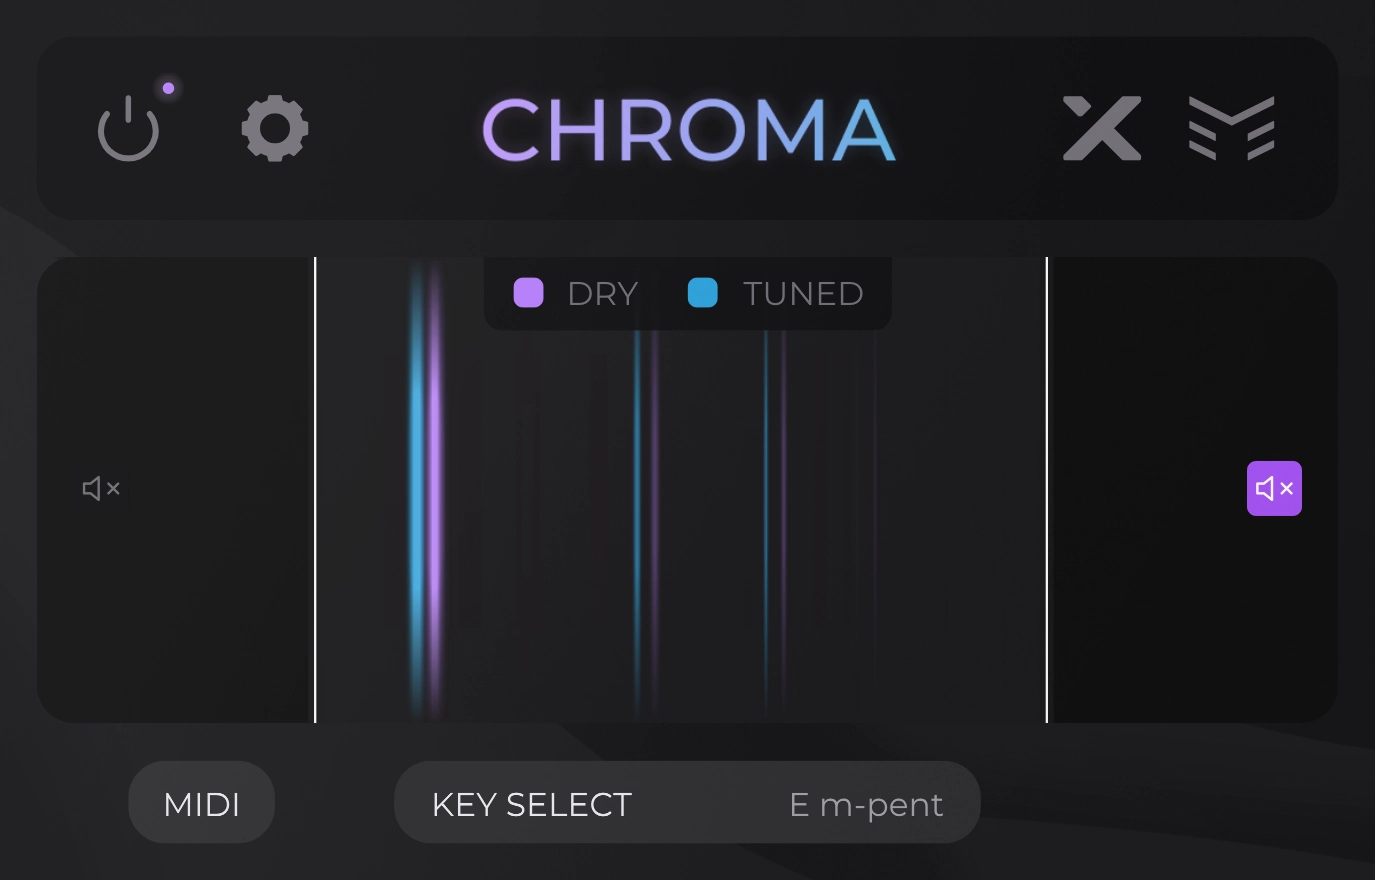
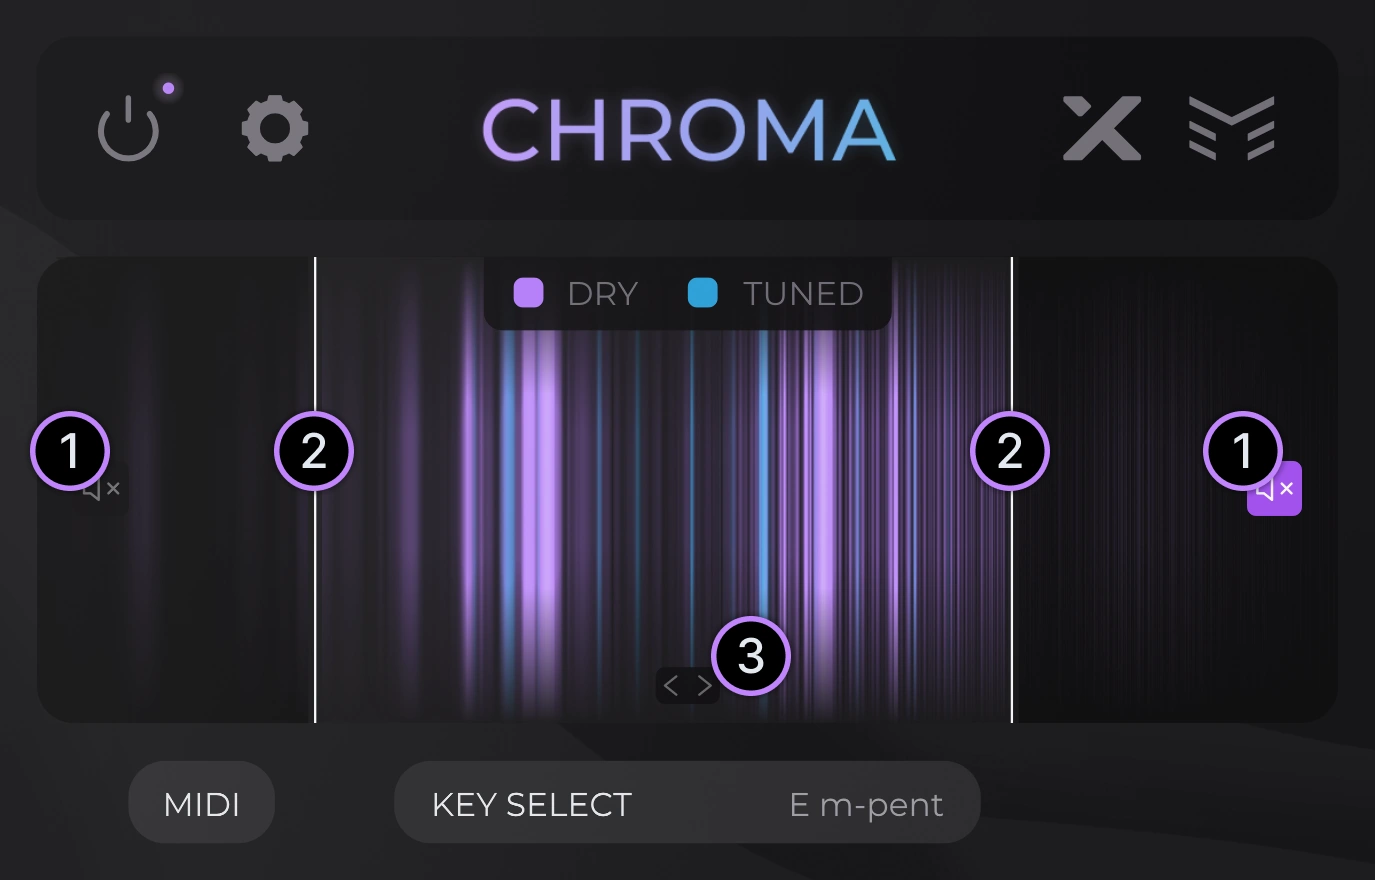
The visualizer displays a real-time spectrum of the signal from 100Hz to 6kHz. The brighter the vertical line, the larger the magnitude of the corresponding frequency.
- The DRY or purple frequencies represent the unchanged input or dry signal. If Chroma is not meaningfully changing the signal, then all active frequencies should appear as DRY.
- The TUNED or blue frequencies represent the frequencies that have been moved or shifted as a result of Chroma's processing. If TUNED frequencies are visible, then neighboring DRY frequencies have been shifted to these new locations.
Example
In the example screenshot above, Chroma is set to the E-minor-pentatonic scale. The input signal is a rhodes piano playing the note F. Since F is not in the selected scale, the frequencies are shifted down by a semitone to the note E.
The DRY (purple) frequencies represent the note F while the TUNED (blue) frequencies represent the note E.
Main Controls
These are the main controls for adjusting Chroma's processing.
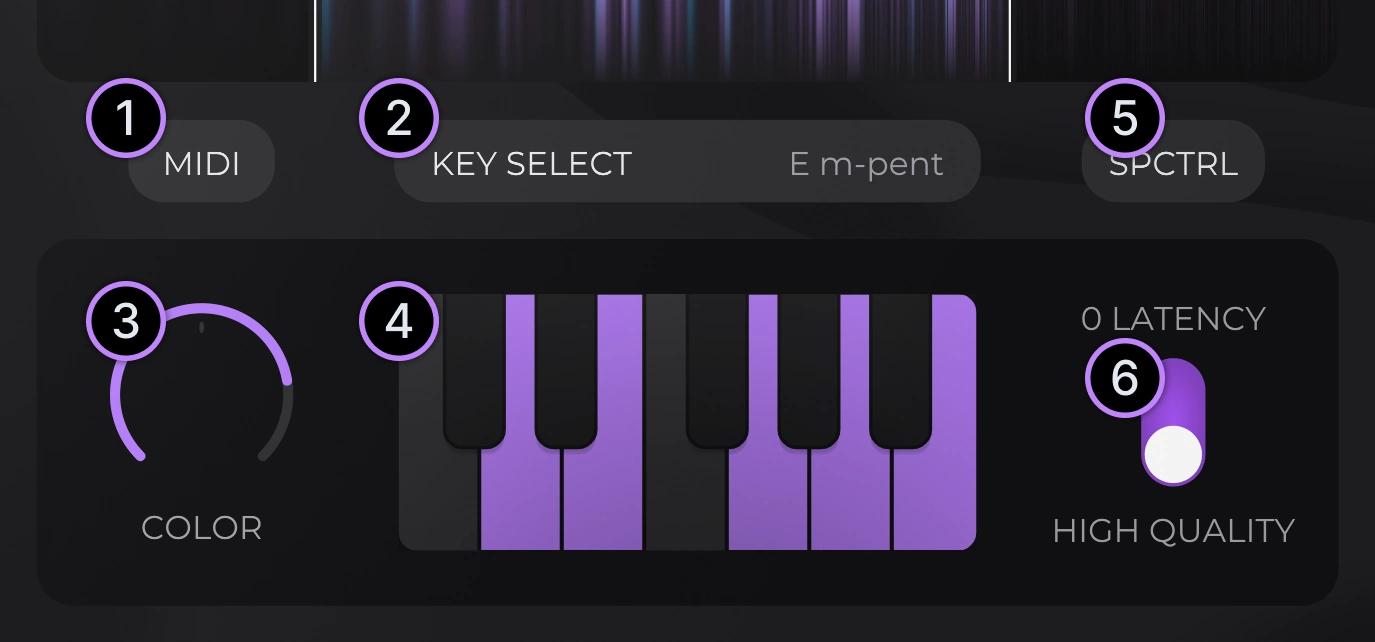
- Toggle MIDI input mode. Right click for more options. For more details, visit the MIDI routing guide.
- Open/close the KEY SELECT window.
- Color acts as a dry/wet mix from 0-100, while values 100-200 introduce additional filters to further resonate in-key frequencies.
- Manual key select. Click on the keyboard to manually enter a key.
- Open the spectral effects window.
- 0-Latency/High-Quality toggle. High Quality introduces latency but usually results in less artifacts.
Key Select
To improve the workflow of using Chroma, the KEY SELECT window provides a simple way to quickly select a key.
To use this window,
- Select a root note.
- Select a scale.
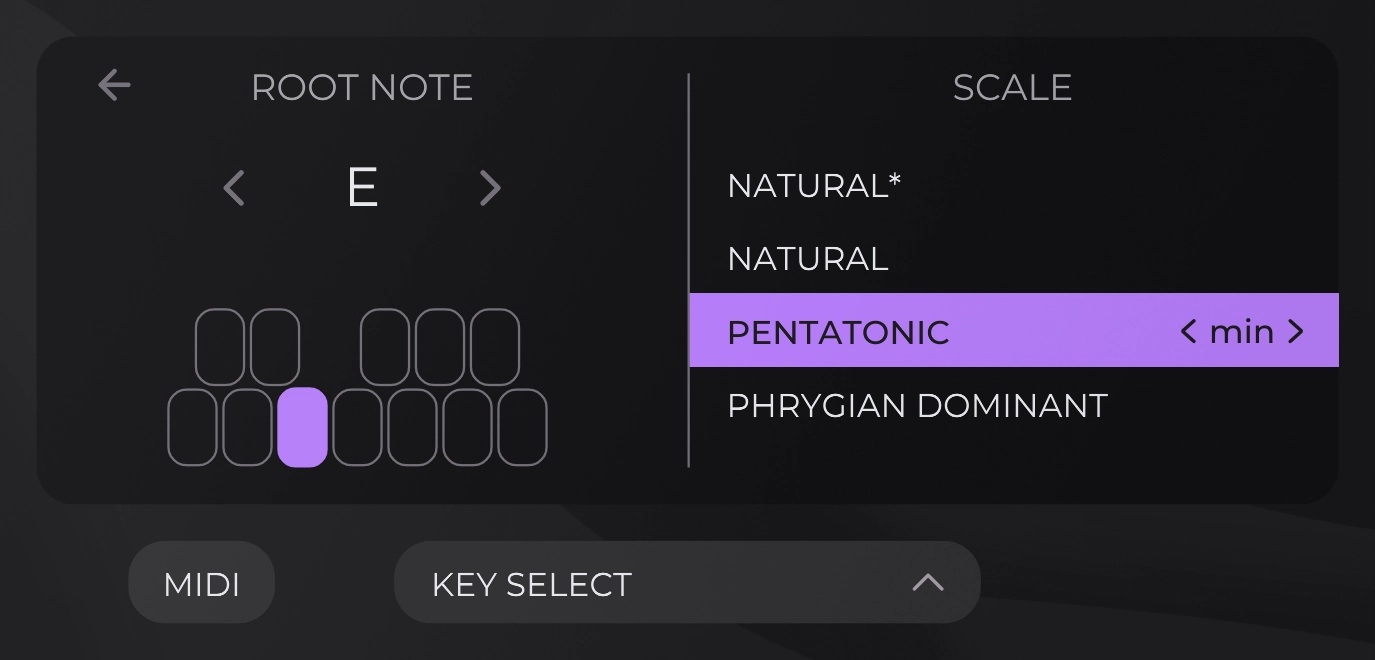
Root Note
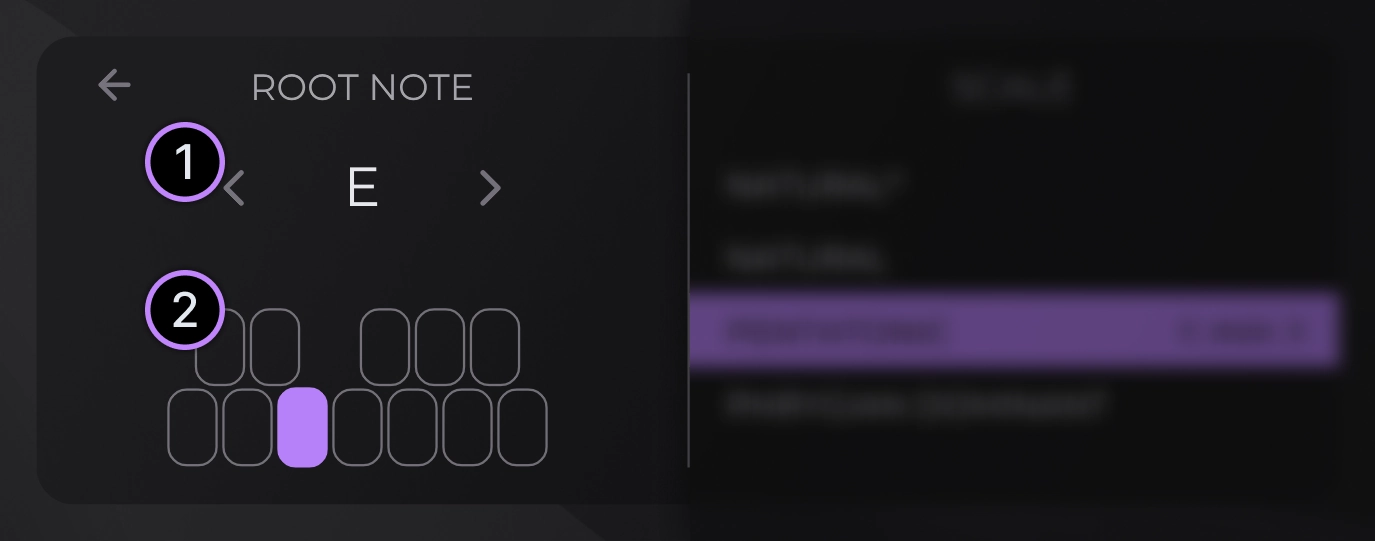
- Clicking on the text will open a dropdown menu to select a note. The scroll-wheel and the arrows on the side allow for quick adjustment of the note.
- The mini keyboard layout provides an alternative way to select the root note. Simply click on the desired note to select it as the root note.
Scale

- Right-click the text to open the
scales.jsonfile. This file contains all the available scales. Feel free to modify this file in order to add custom scales! When modifying this file, be sure to close then reopen the Chroma interface to see the changes. - Choose a scale from available list of scales.
- Some scales have minor/major variants, which can be toggled here. Holding the 'shift' key while clicking will switch to the relative version of the scale.
Spectral
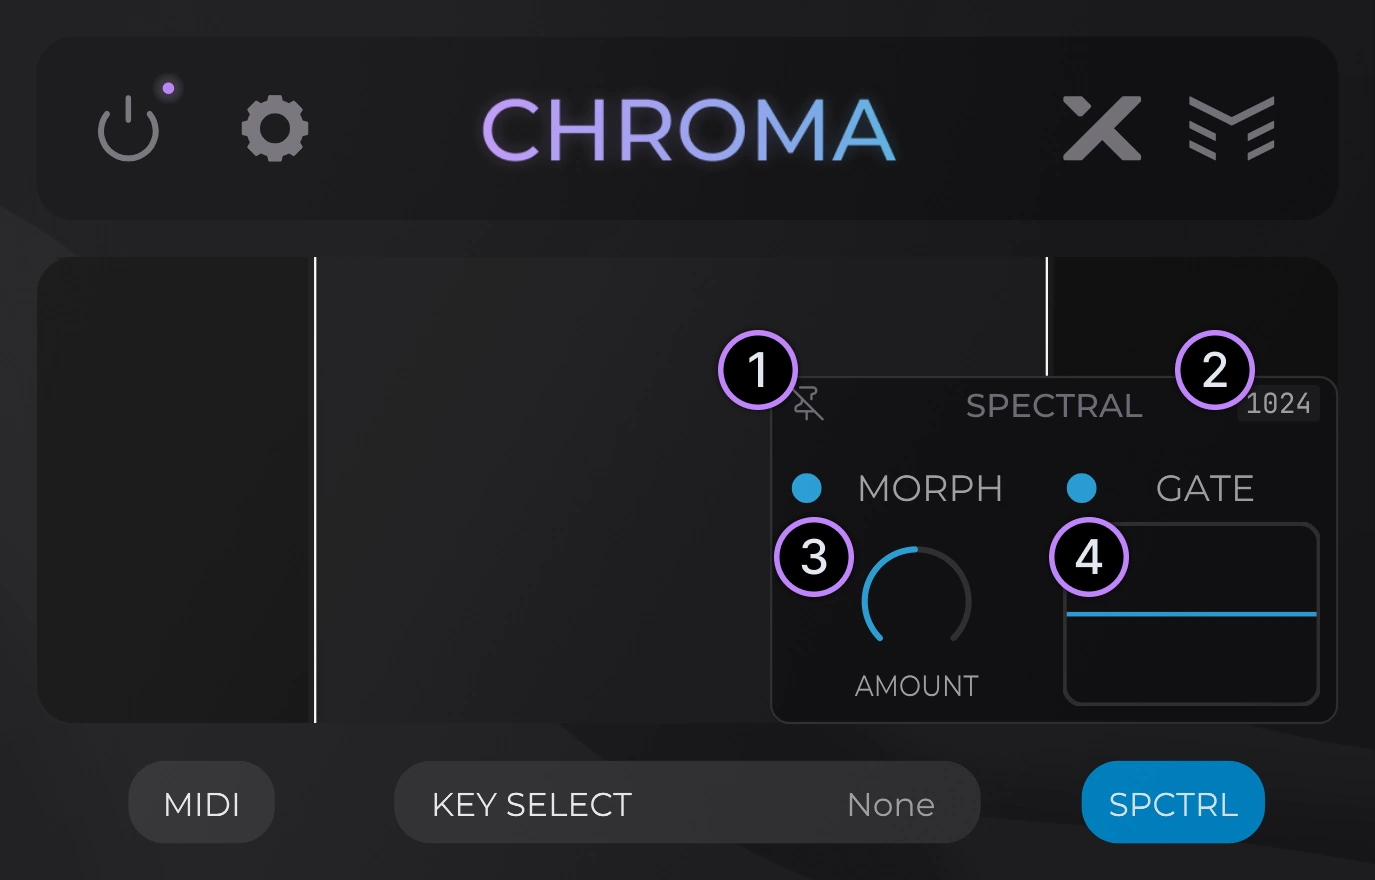
- Pin toggle for the spectral window. Prevents clicks outside the window from closing it.
- FFT size toggle. Choose between
512and1024FFT lengths. The larger size typically has cleaner results in exchange for added latency. - Toggle and adjust spectral morph.
0%is for no morphing,100%is fully morphed. - Toggle and adjust spectral gate. Higher thresholds will silence more frequencies.
> Note: Toggling on either spectral effect will introduce latency, even in 0-latency mode.
Morph
The spectral morph feature allows for the blending of dry and wet magnitudes in the frequency domain. This allows Chroma's output to maintain its "coloration" while preserving the dry signal's transients and tails.
Try using this feature with Chroma's COLOR parameter above 100%.
- At
0%morph, the signal is unchanged, passing Chroma's wet output through. - At
100%morph, the wet signal's magnitudes are replaced with the dry signal's magnitudes, while keeping the phase untouched. - For in-between values, the dry and wet magnitudes are blended (linearly-interpolated) between the two extremes.
Gate
The spectral gate feature acts as an audio gate for each frequency bin with the dry signal sidechained. The gate analyzes the dry input signal.
- If a frequency bin of this signal is above the adjustable threshold, the corresponding wet frequency bin is left unaffected.
- However, if a frequency bin of the dry signal is below the threshold, the corresponding wet frequency bin is silenced.
This allows for a simple way to shorten any ringing or tails created by Chroma's processing.
Settings
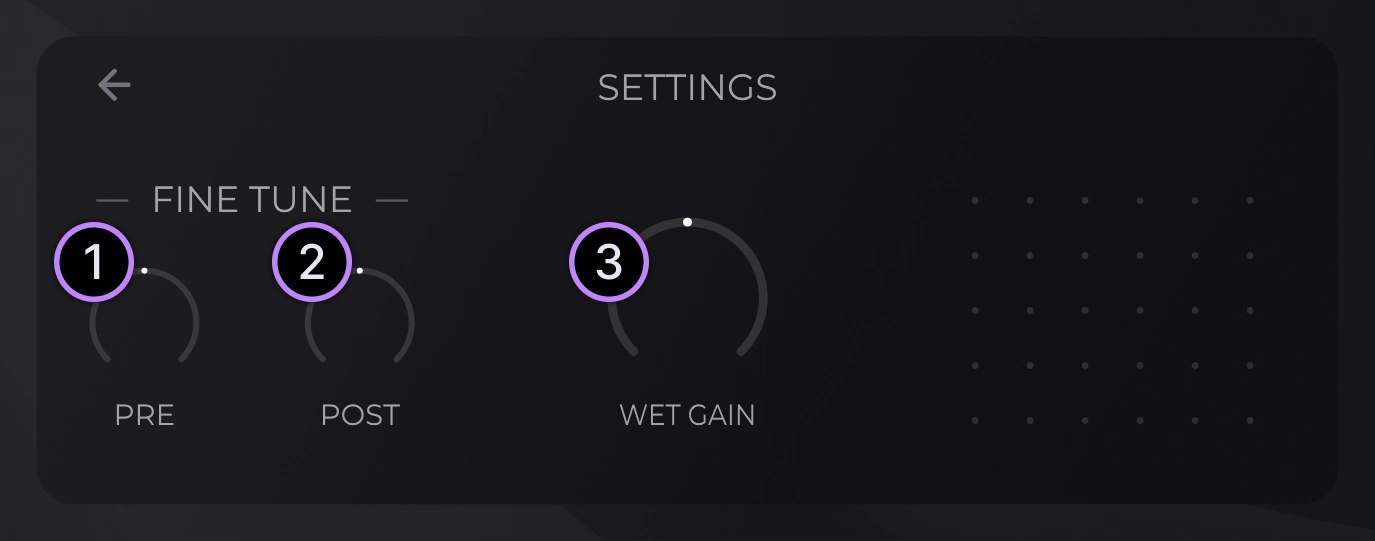
- Pitch shifts the incoming signal by the selected amount before any other processing, affecting only the active frequency region. Useful for atonal signals to try and hit a "sweet spot" where the processing sounds the best.
- Shifts the tuning of Chroma, functioning as a more traditional fine-tune control for the processing.
- Adjusts the gain of the processed region of frequencies.
- Click the three dots to reveal the following settings: Multirate toggle.
Multirate Processing
(Introduced in v1.2.0)
When enabled, this feature will run Chroma's processing at an internal lower sample-rate. This will greatly reduce CPU load at the cost of some subtle changes to Chroma's sound.
If loading a project that was initially saved with an older version of Chroma, the multirate processing will be disabled to preserve audible consistency.