Rezonator
Rezonator: Add harmonic resonance to any sound.
Overview
For a general overview of Rezonator, visit the product page.
- To reset any control, double-click it or right-click it and choose RESET.
- Click the REZONATOR logo on the top-left to view the about screen and check for updates.
Basic Controls
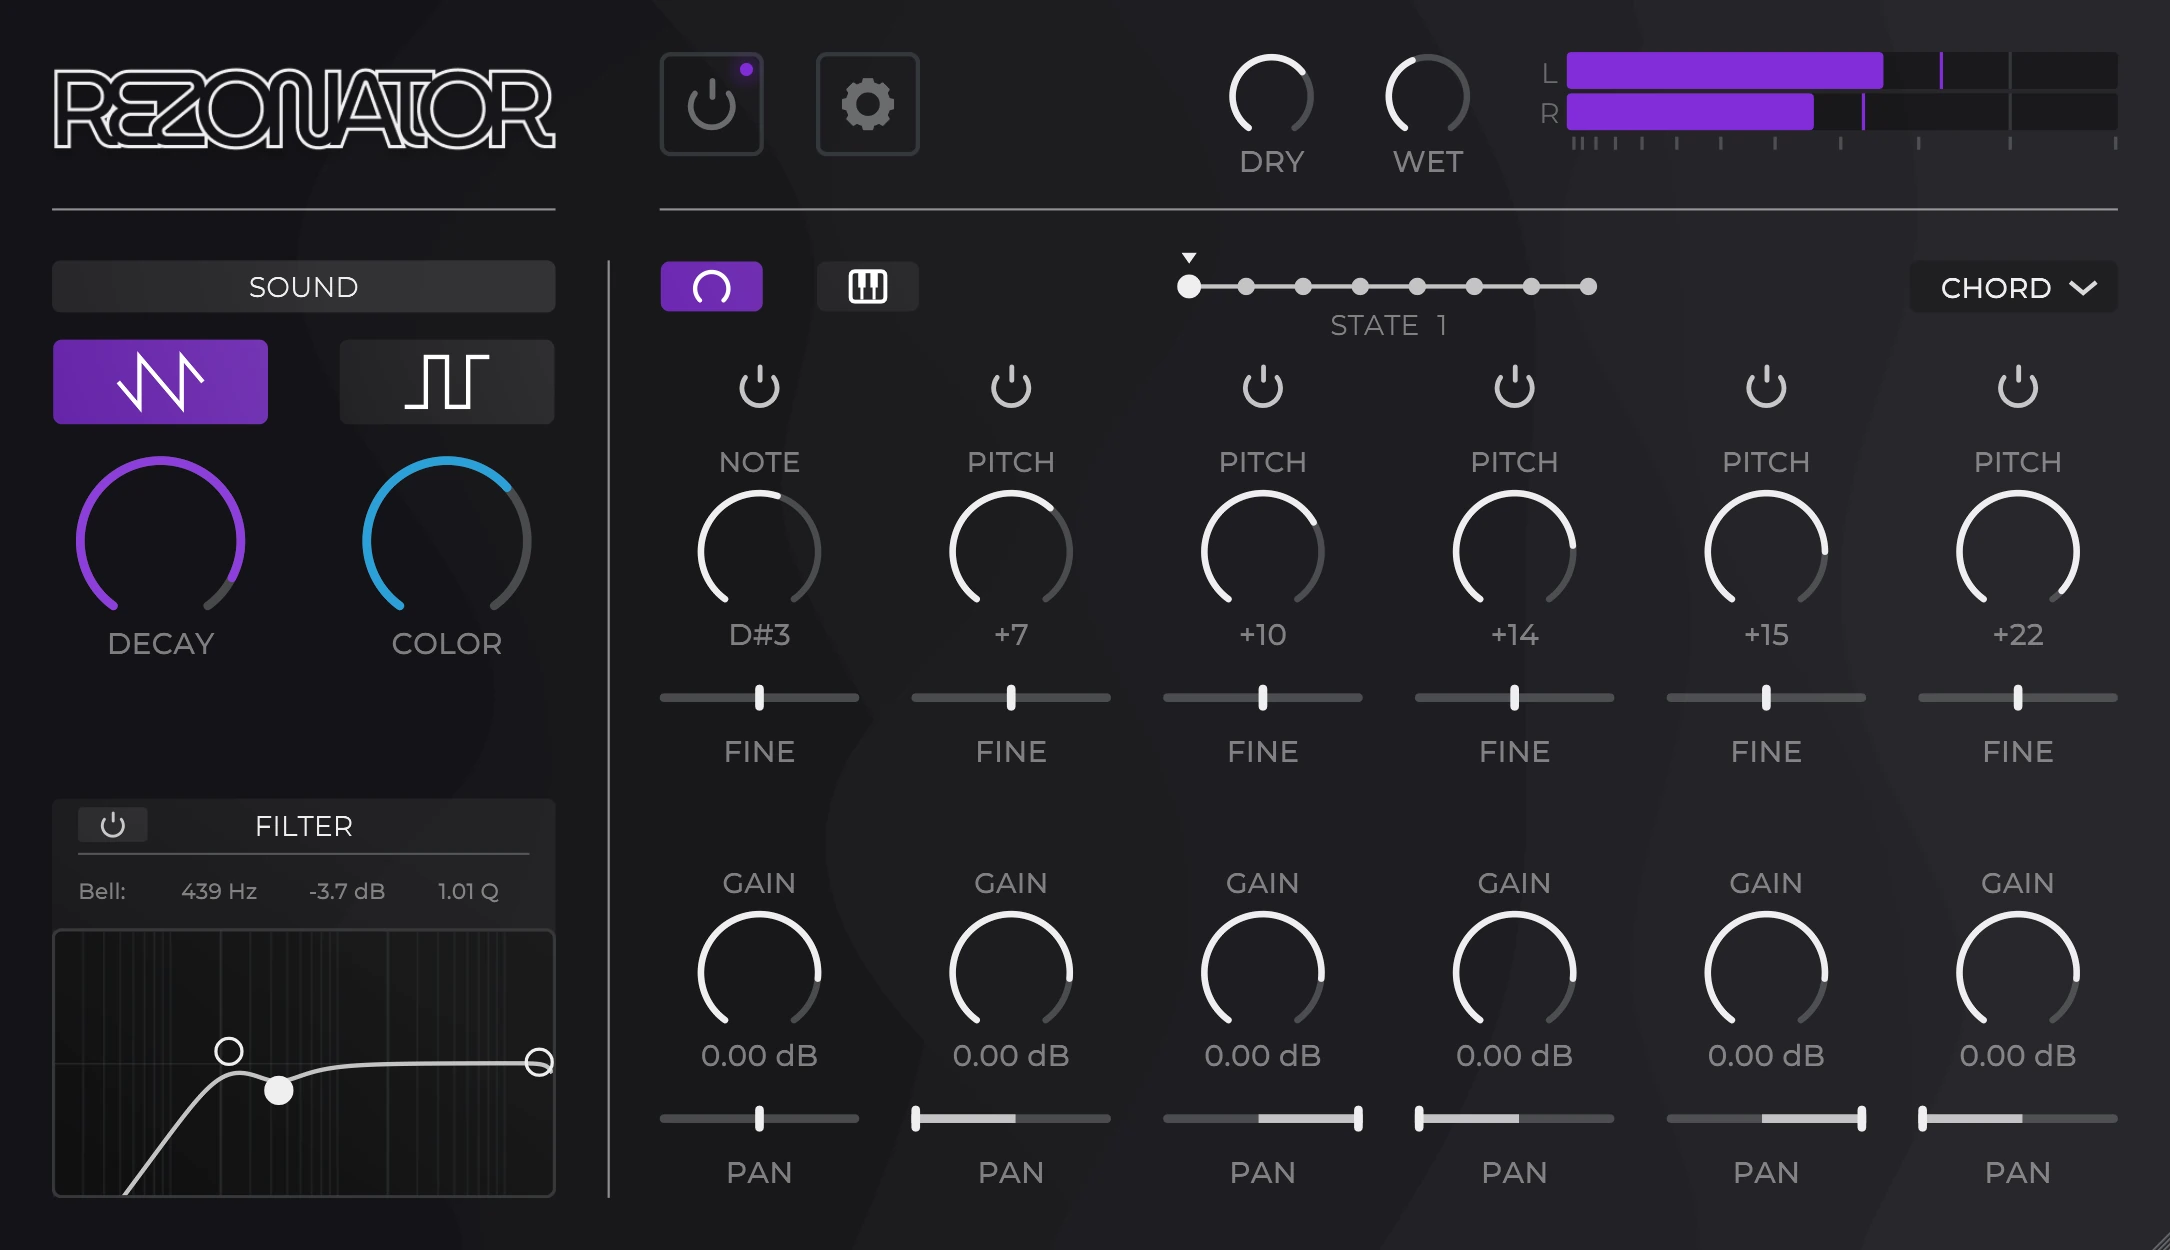
- Plugin bypass.
- Open/close settings menu.
- Dry signal gain.
- Wet signal gain.
- Output signal meter.
Global Controls
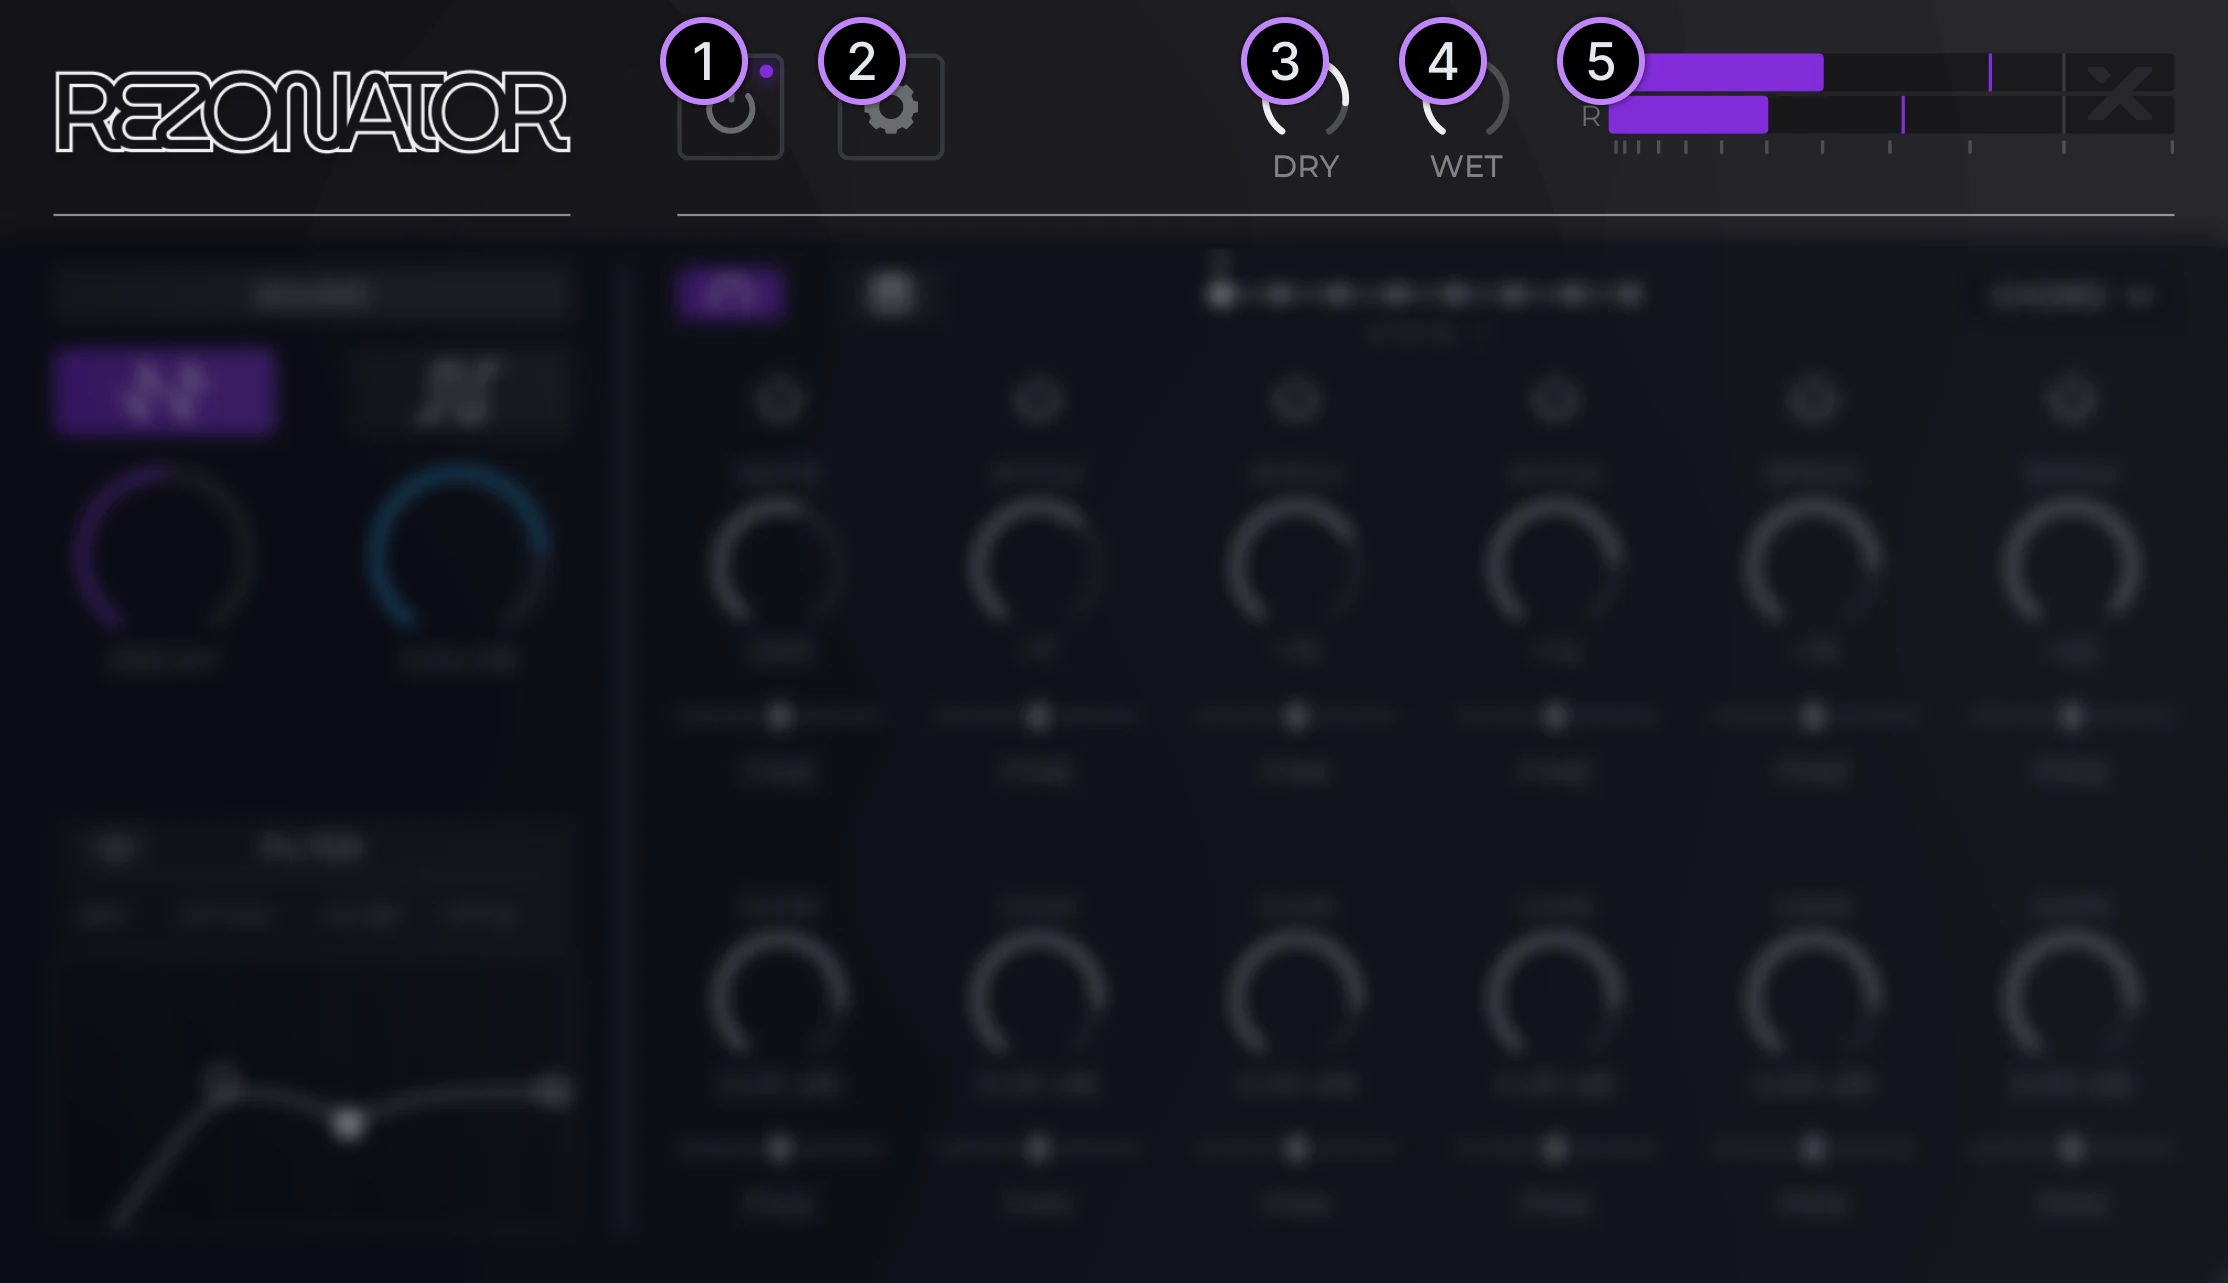
- Sound type.
- Decay.
- Color.
- Filter.
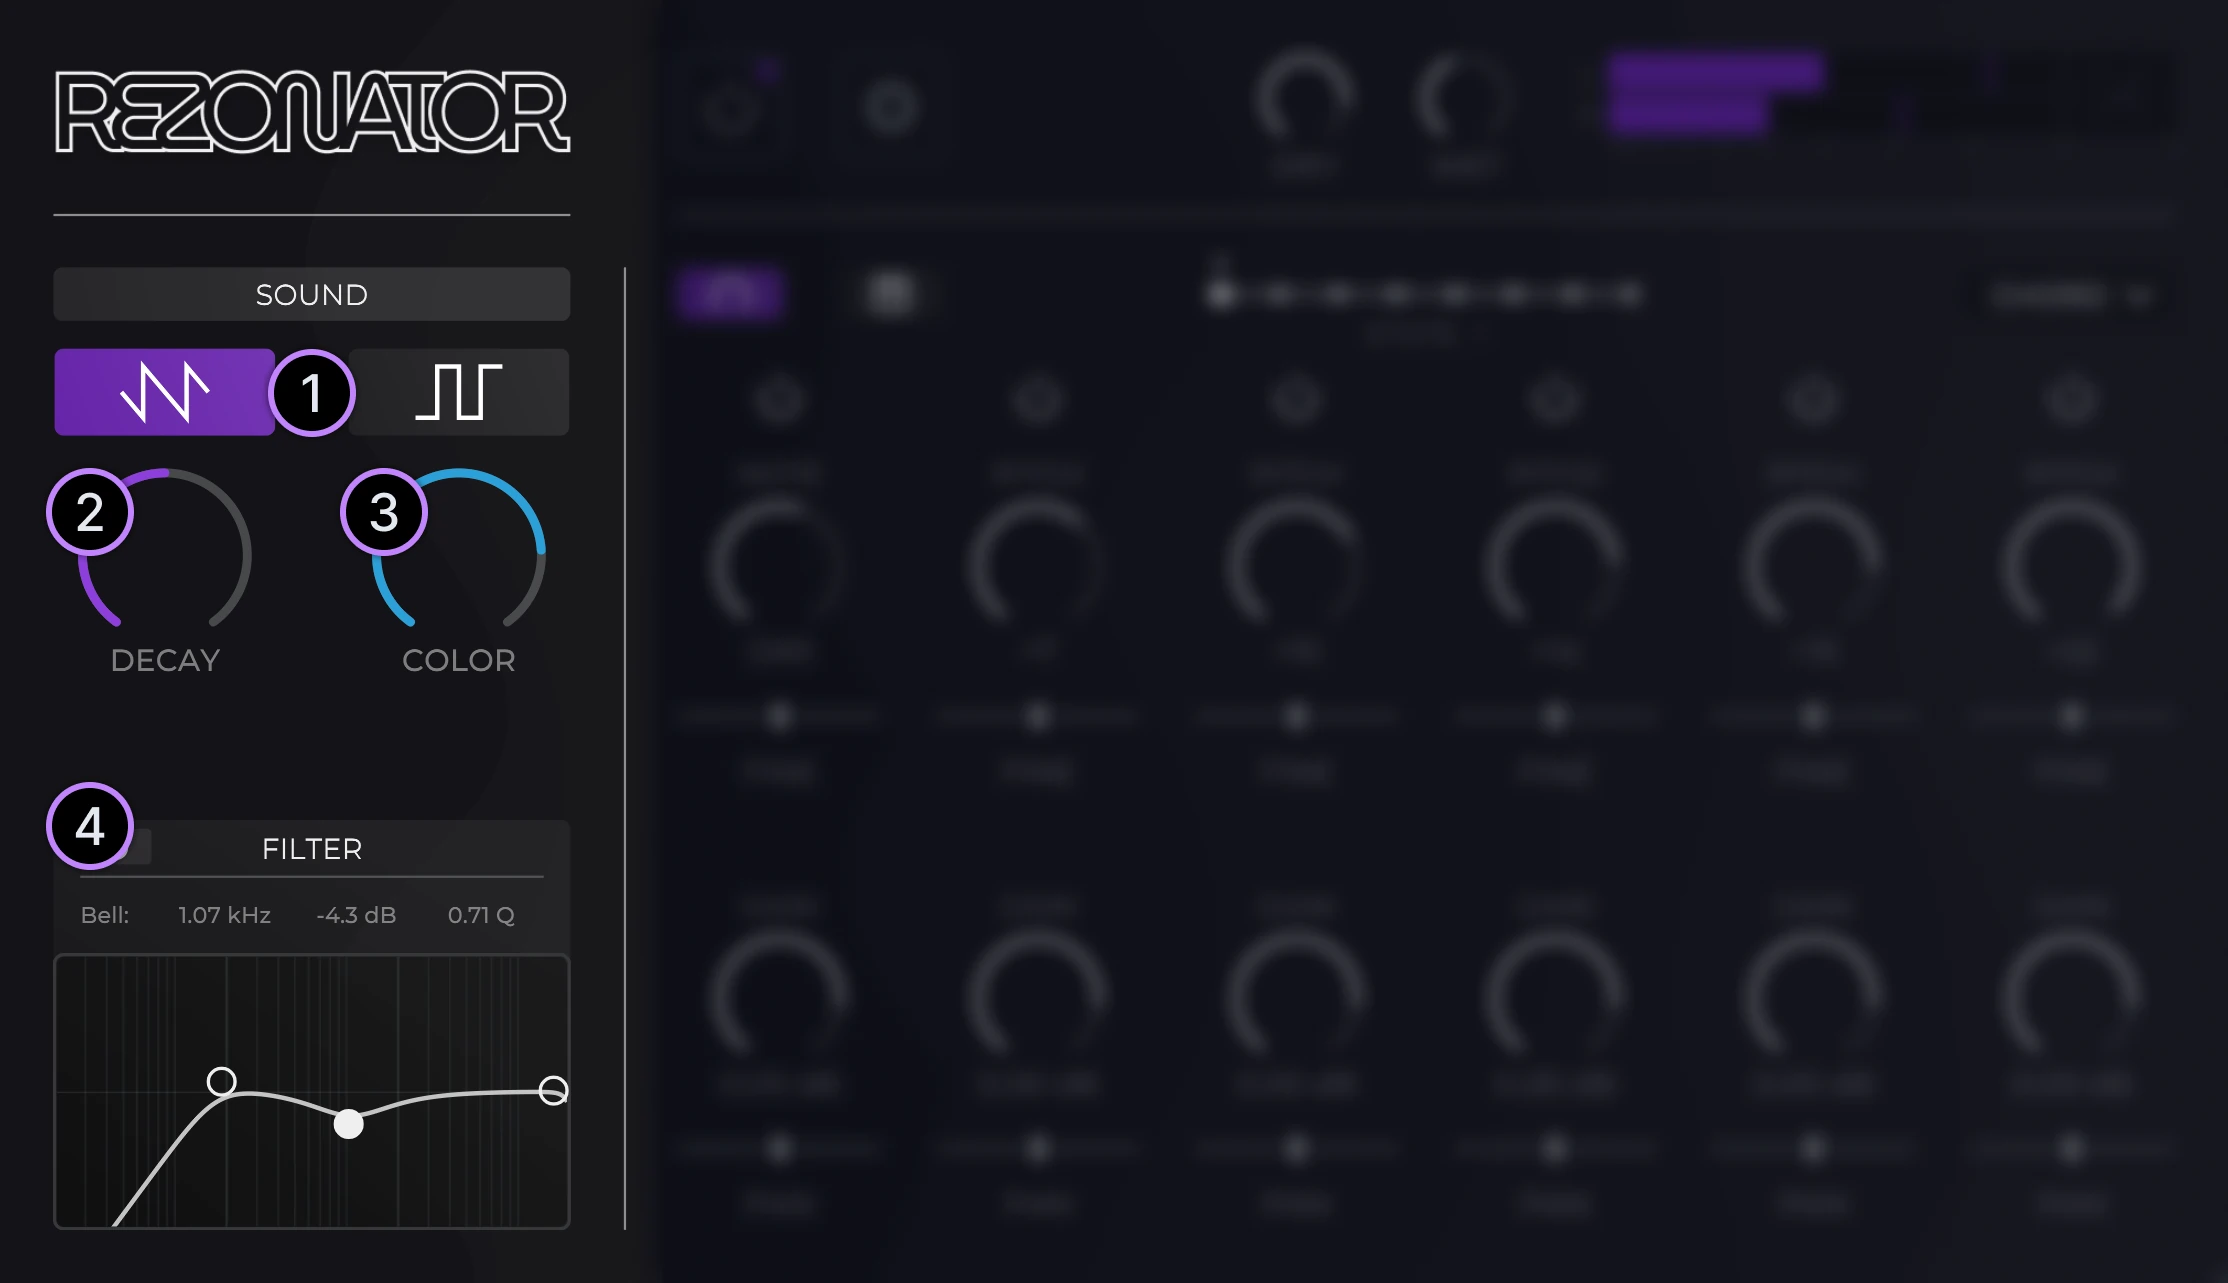
Sound Type
The sound type changes the type of comb filtering used.
- Saw-mode: Uses positive comb filtering; resonates all harmonics.
- Square-mode: Uses negative comb filtering; resonates only odd harmonics.
Decay & Color
Decay controls the amount of feedback/resonance present in the comb filtering.
- Higher decay values result in more feedback/resonance, thus providing a longer tail to the sound.
Color controls the amount of high-frequency attenuation in the comb filtering feedback loop.
- Lower color values result in more attenuation, providing a "softer" and more "muffled" sound.
Filter
Filter only the wet signal.
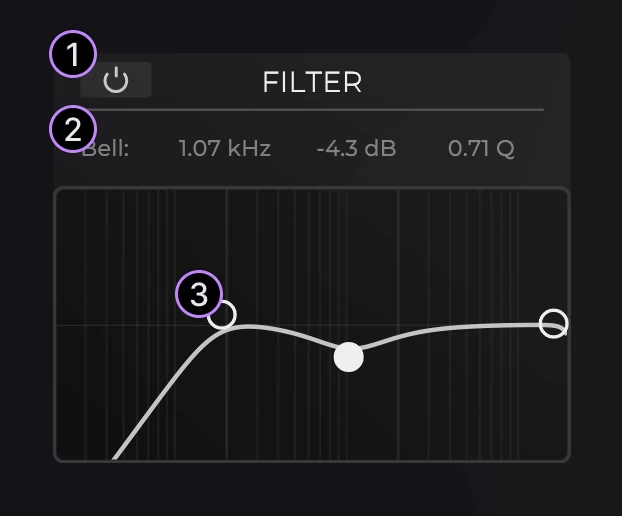
- Bypass the filter. Ensure the filter is enabled before using it.
- Editable parameters for each filter control. Drag or double-click to edit the values. These values change depending on the control selected.
- Filter controls. These controls can be used to adjust the high-pass, bell/peak and low-pass filter respectively.
Resonator Tuning
Control the tuning of the six resonators either via manual tuning or MIDI input.
Relative/Manual Tuning
By default, Rezonator allows you to individually adjust the tuning of each resonator.
- Note: The first resonator is unique, as it is used to specify the root note. The remaining five resonators are tuned relative to the first.
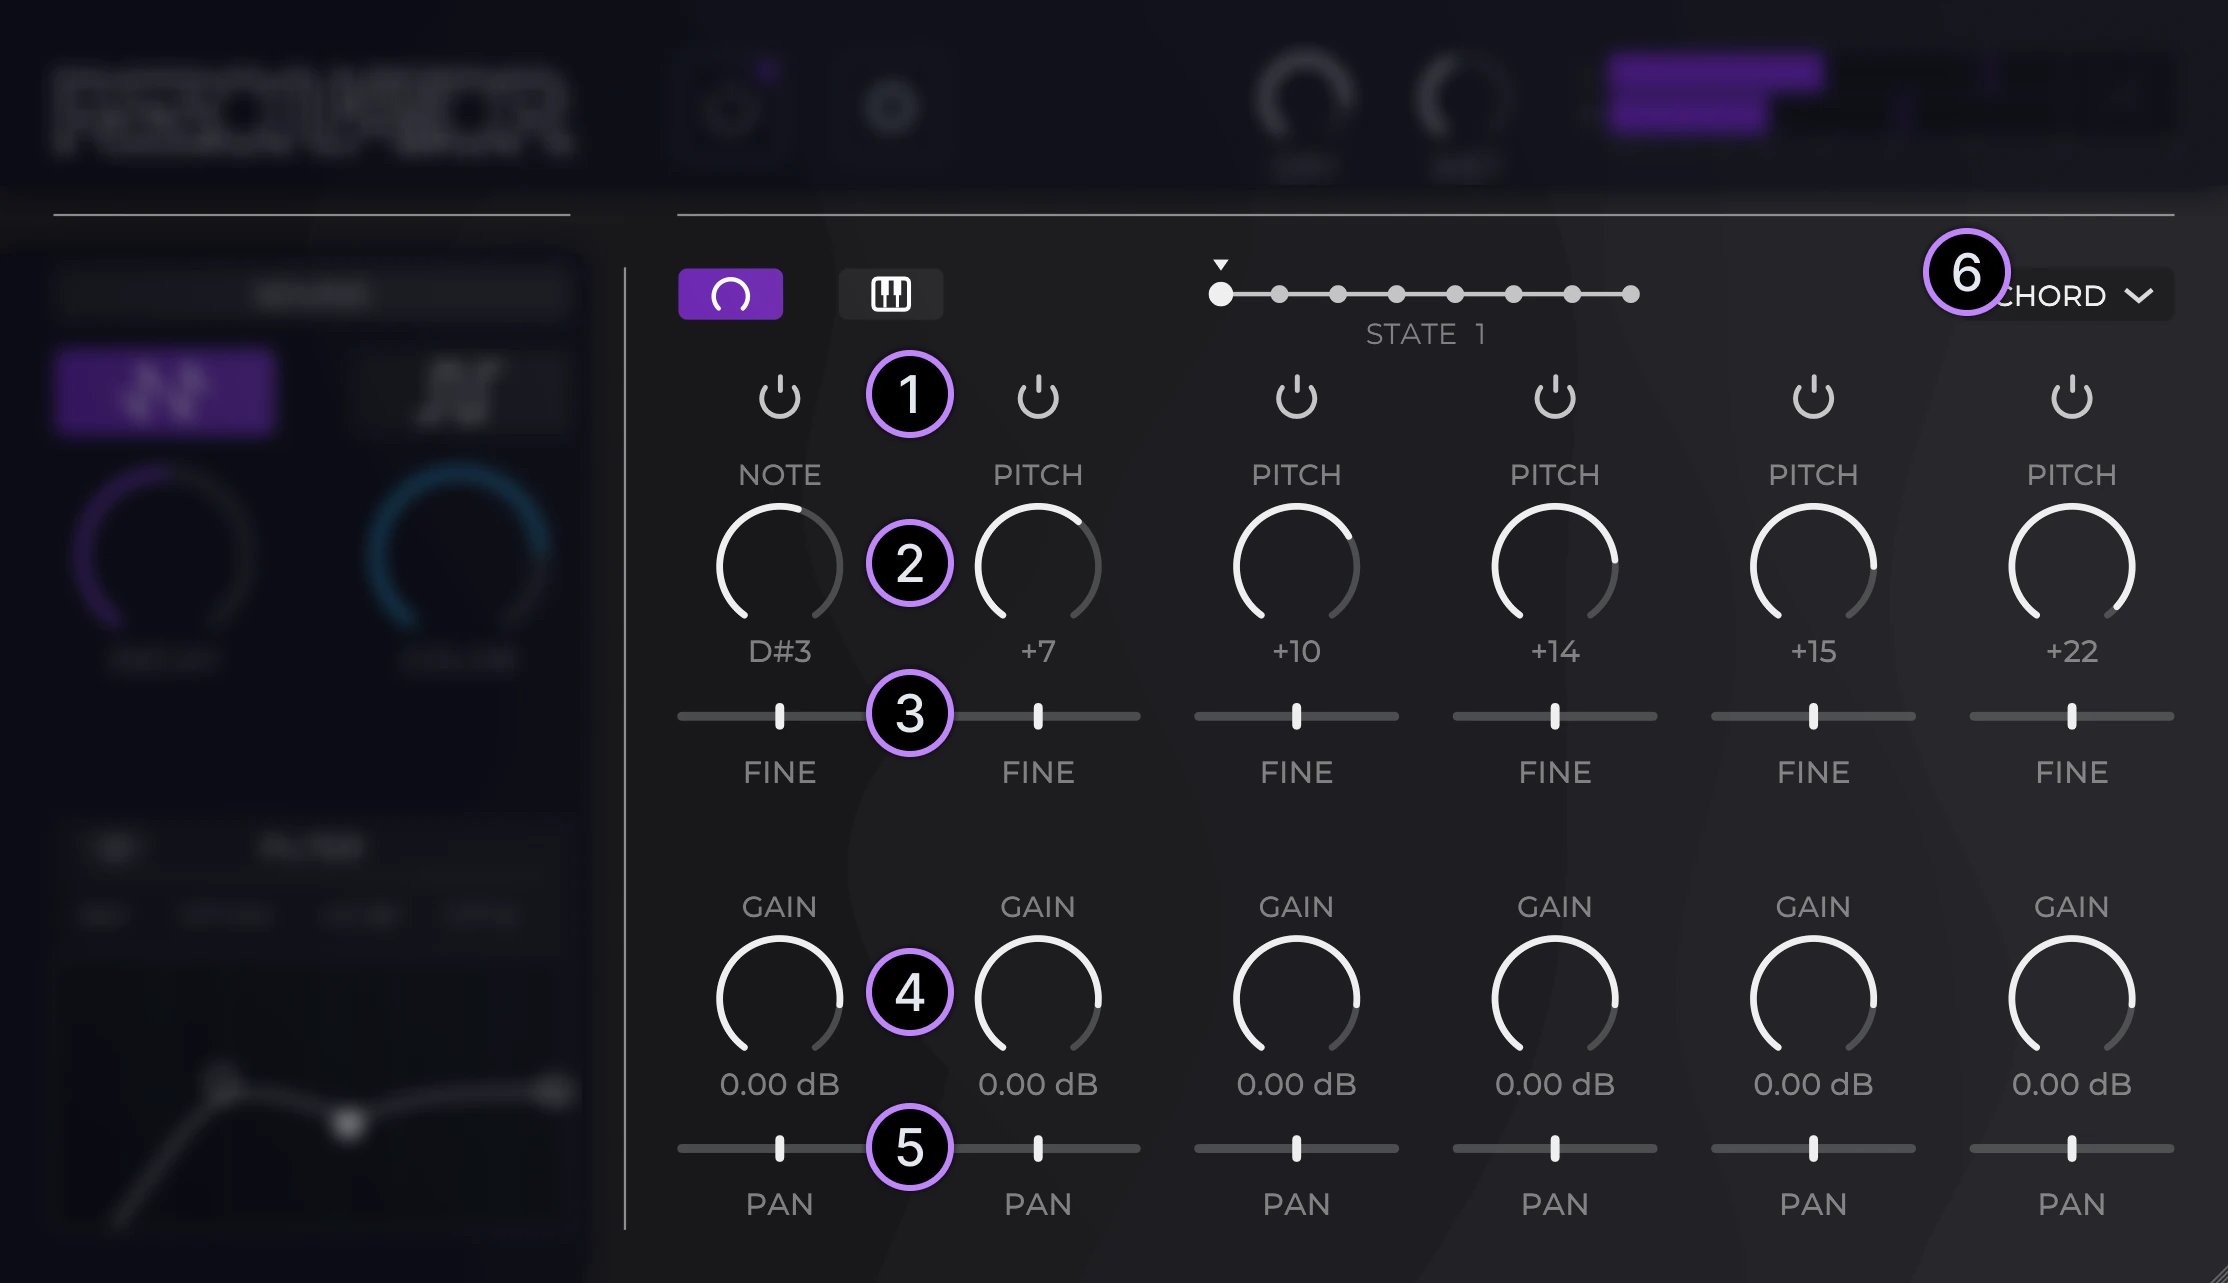
- Resonator enable toggle.
- Resonator note/pitch. The first resonator is tuned absolutely, while the remaining five are tuned relative (displayed as offsets in semitones) to the first.
- Resonator fine-tune. Adjust the tuning of each resonator in cents. Once again, the last five resonators are tuned relative to the first.
- Resonator gain, in units of dB.
- Resonator panning. Creating an alternating pattern of panning (as shown in the image above) can be used to easily create additional stereo ear-candy.
- Preset chords. Note: the root note of the chord depends on the tuning of the first resonator.
Rezonator States
Program chord progressions or key changes using states.
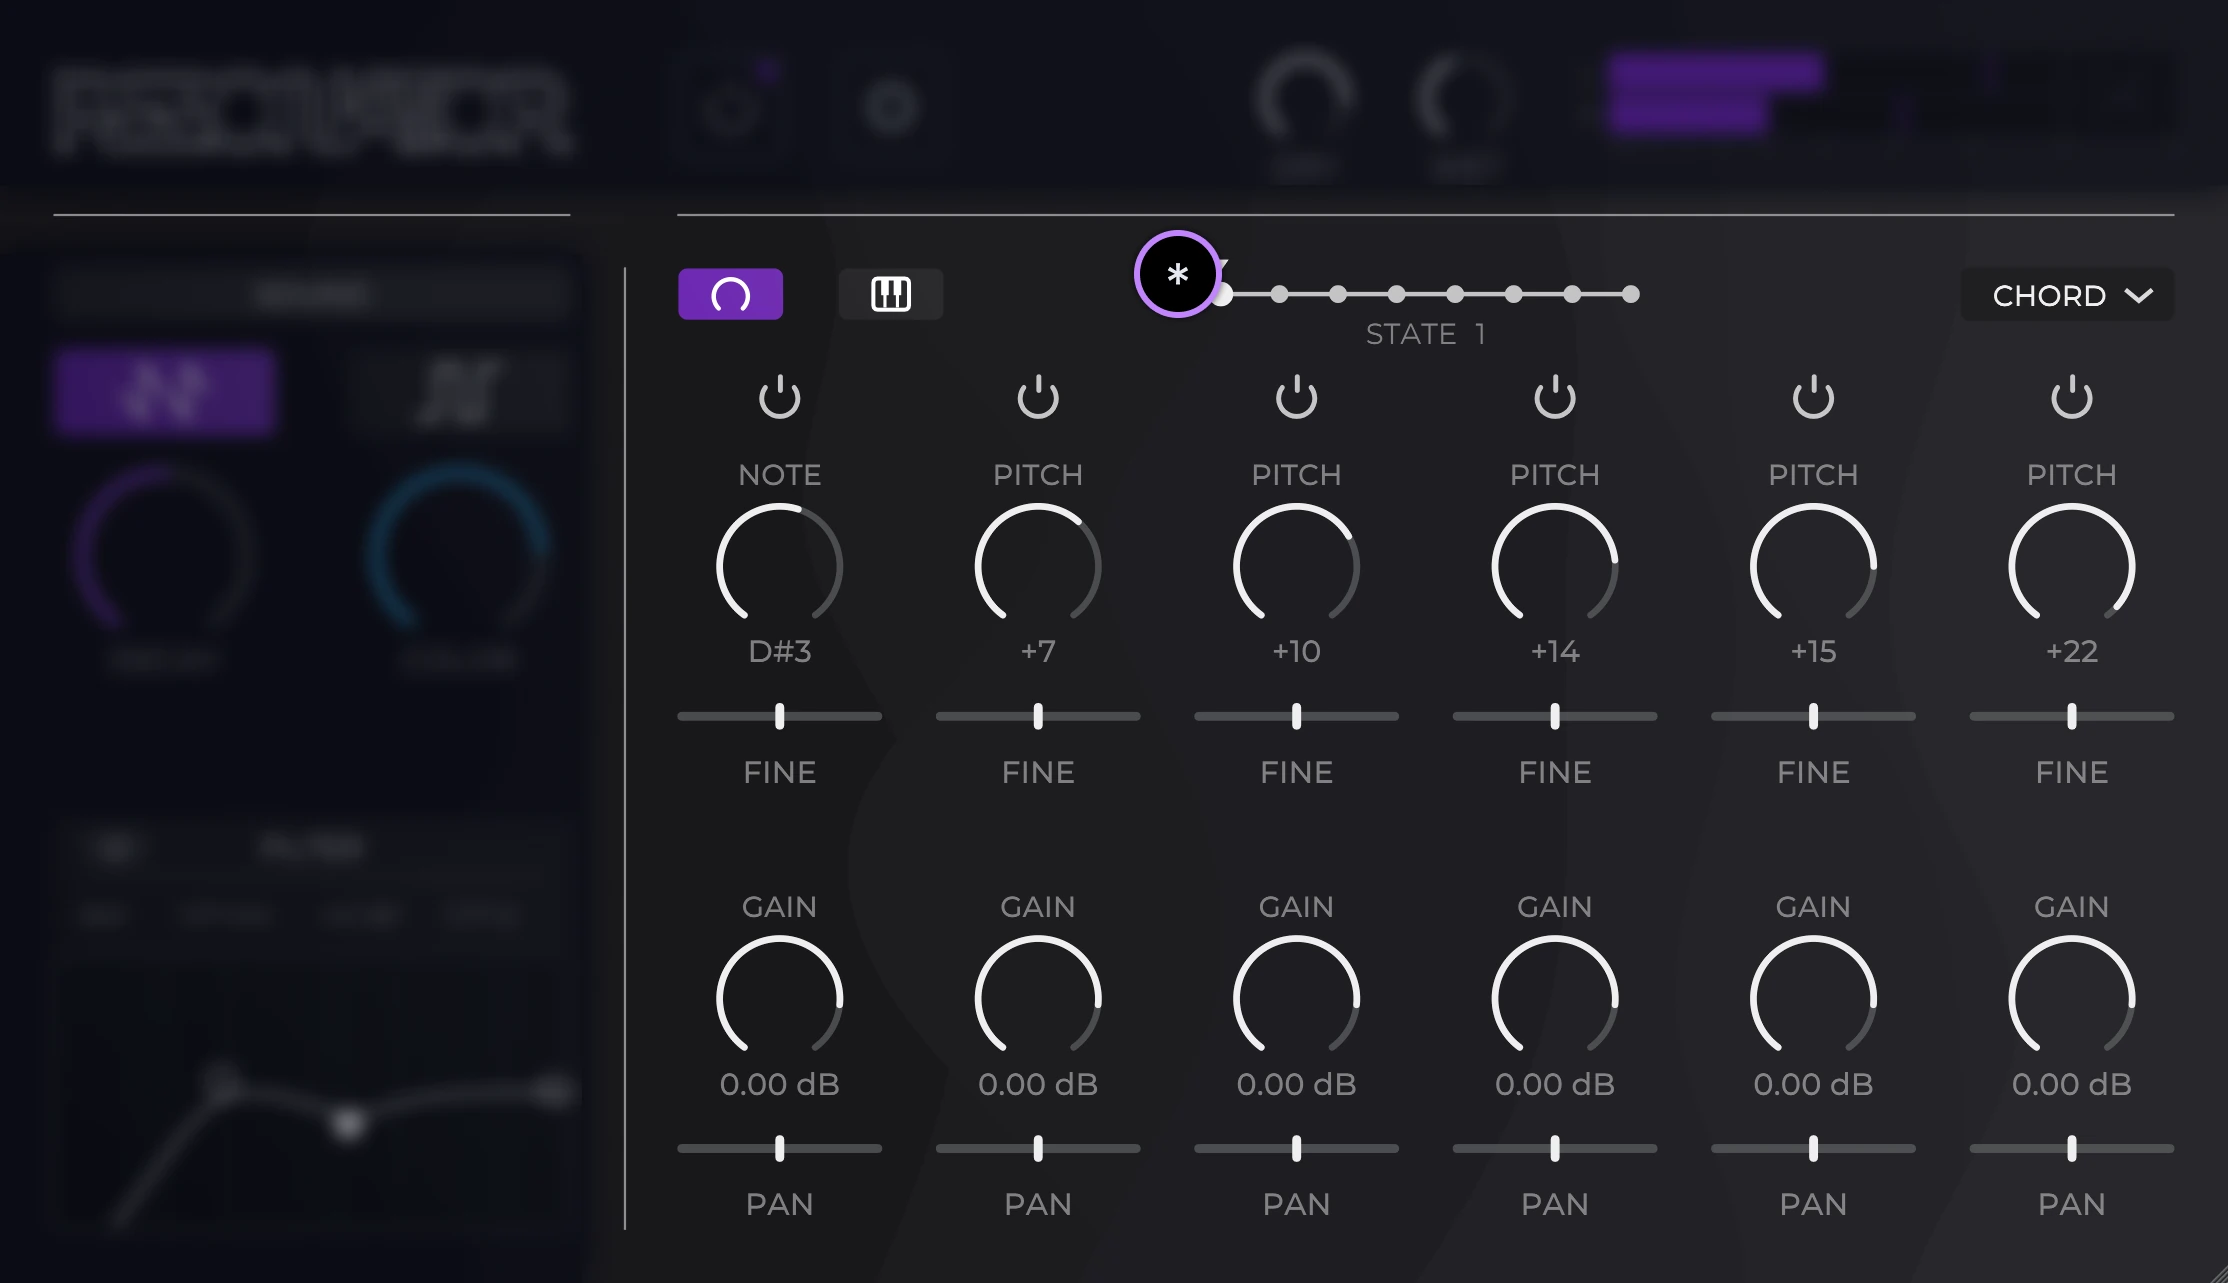
- To change/select states, drag the STATE slider.
- To edit a state, first select it and simply begin adjusting the resonator controls.
- To reset the current state, right-click the STATE slider and choose RESET.
Tip: When working with states, it is common to want to set a resonator parameter to a certain value for all states. Instead of manually adjusting the parameter for all 8 states, simply right-click the parameter and choose SET ALL.
MIDI Input
Useful for complex melodies, chord progressions, or key changes.
- For instructions on how to route MIDI into Rezonator in various DAWs, view our MIDI routing guide.
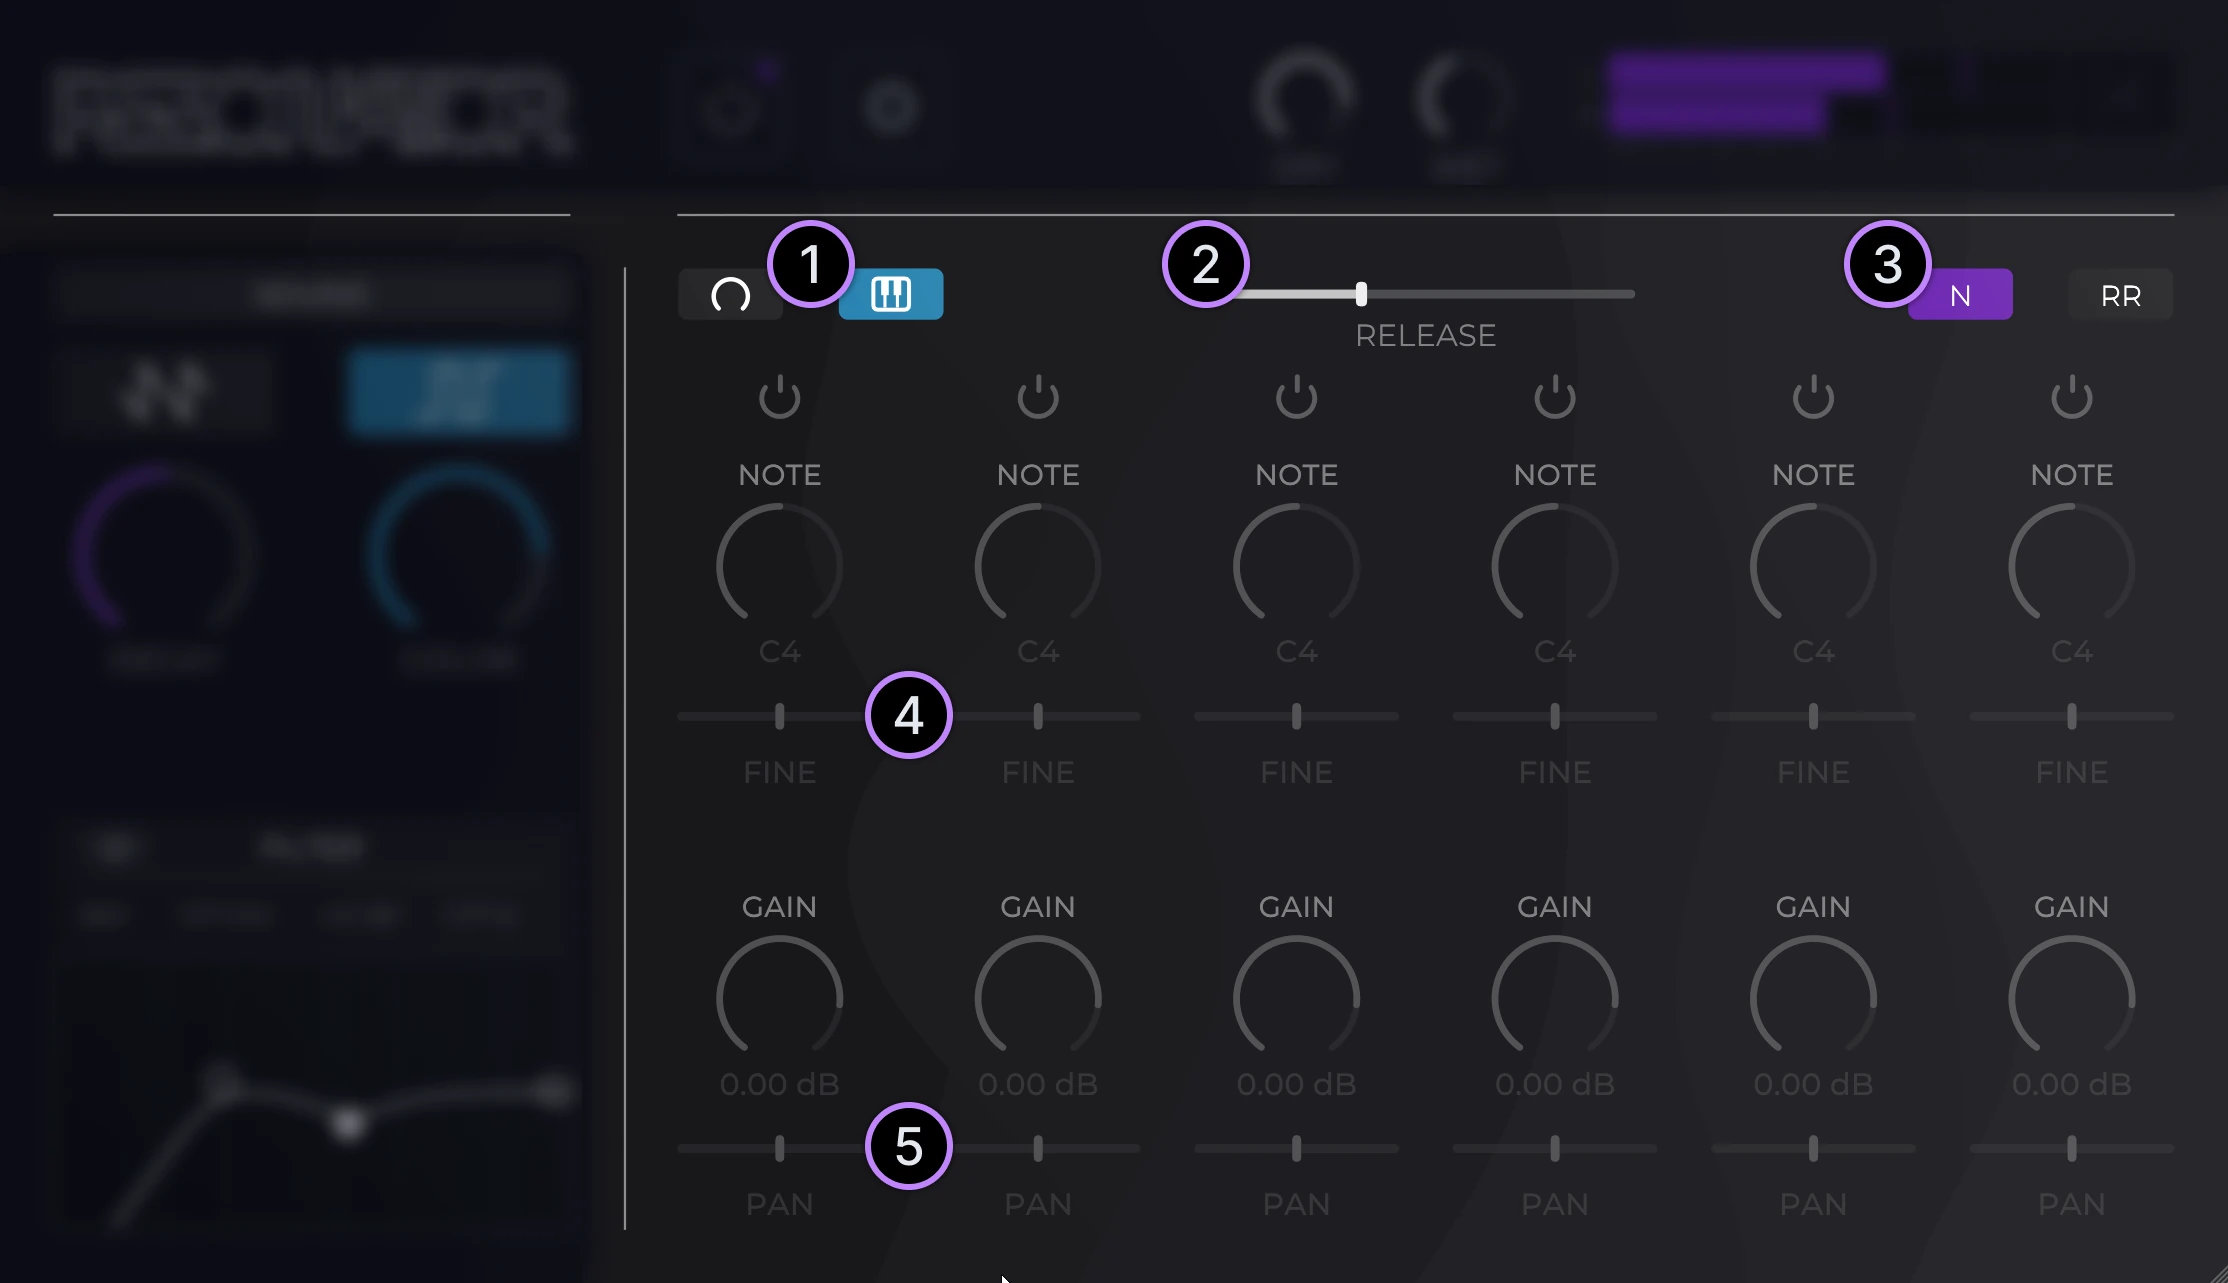
- MIDI Input toggle. Before attempting to route MIDI into Rezonator, ensure that the MIDI input mode is enabled.
- Release/Size. In Normal MIDI input mode, the Release slider will be visible. Similar to an ordinary synthesizer with an ADSR control, this will adjust the release tail of the notes. When using the Round-Robin MIDI input mode, the Size slider will be visible. This will control the maximum number of notes that can be played.
- Normal/Round-Robin toggle, adjusts how MIDI notes are handled. More information below.
- Since standard MIDI cannot transmit per-note fine-tune data, the fine-tune controls are still manually adjustable.
- Like the fine-tune data, the panning data is also manually adjustable.
Normal vs Round-Robin
- In Normal mode, the notes are treated very much like a traditional synthesizer; each note played will attempt to choose an unused resonator. If all resonators are currently playing, the new note will replace the oldest note.
- In Round-Robin mode, notes/resonators are never released; releasing a note will NOT stop the resonator from playing. As in the Normal mode, once all resonators are playing, the oldest note is replaced. Try playing arpeggios using Round-Robin!
Settings
Additional parameters to further control the resonated signal.
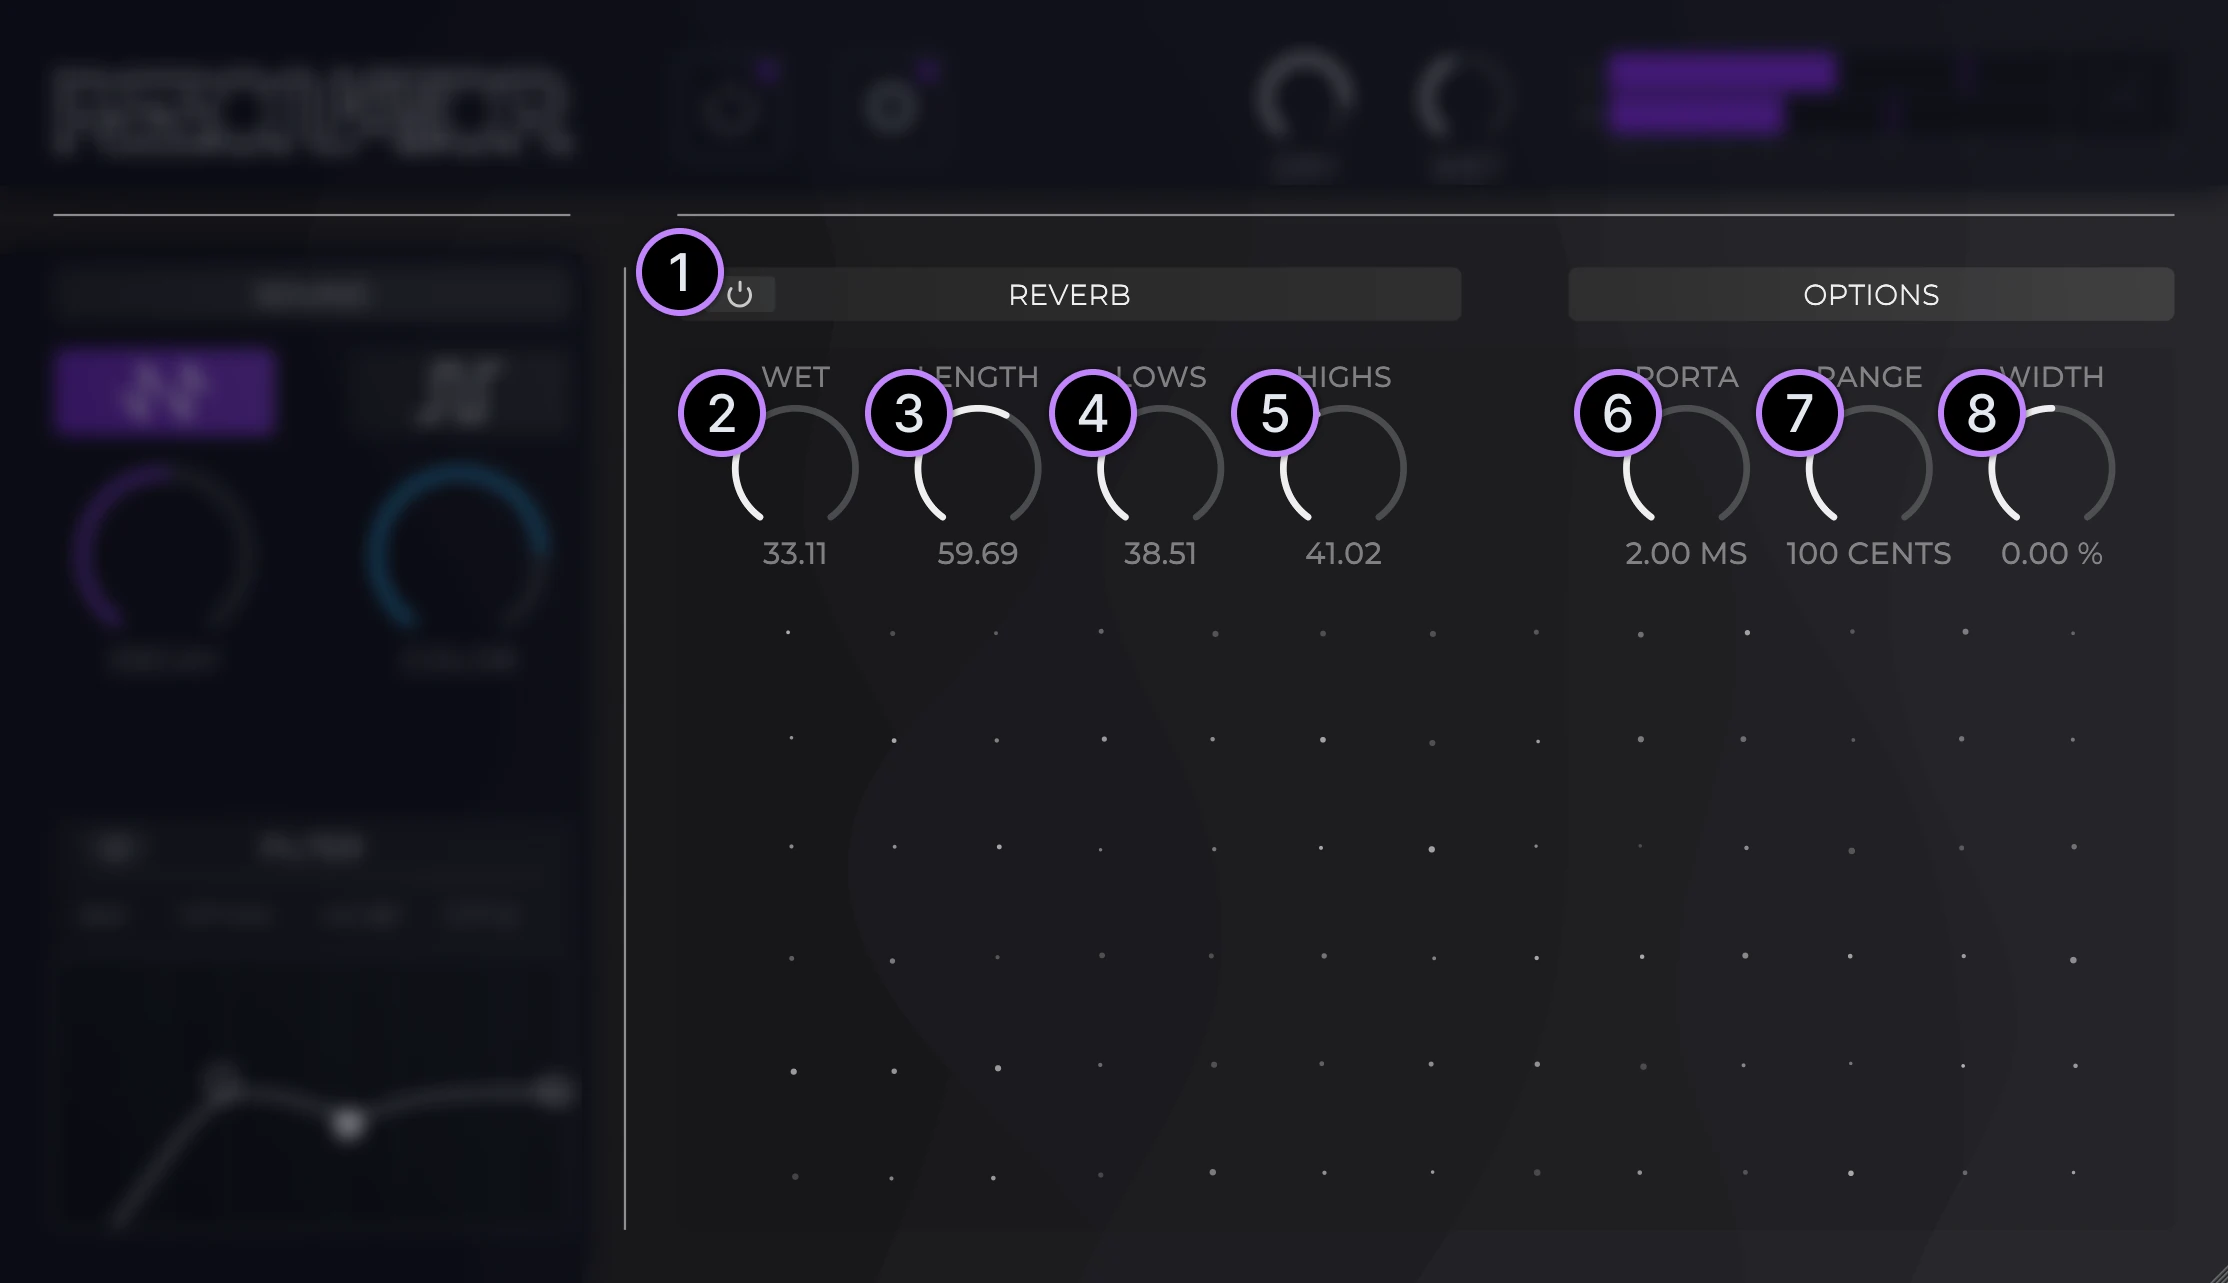
- Reverb toggle. Ensure this is enabled in order to use the reverb.
- Reverb dry/wet mix amount.
- Reverb length; larger values result in a larger/longer reverb.
- Reverb lows. Control the amount of low frequencies present in the reverb.
- Reverb highs. Control the amount of high frequencies present in the reverb.
- Portamento. When changing notes/tuning for each resonator, this controls the amount of "glide" introduced in order to smoothly transition the note changes.
- Fine tune range. Adjusts the range of values the fine-tune parameters can occupy. Useful for automating precise glides.
- Stereo width. This effect adds stereo width by delaying either the left or right audio channel, similar to the "Haas Effect".